Wednesday, January 26, 2011

Ratatouille

Ratatouille has turned into one of our favorite vegetable meals. It's a great way to get some vegetables into your diet with lots of flavor. It's one of our favorite vegetarian meals in the summertime when the vegetables are at their peak of freshness. I got this recipe from the Joy of Cooking cookbook.


Ratatouille

Heat in a large skillet or Dutch oven over high heat:
1/4 cup olive oil
Add 1 medium eggplant (about 1 pound), peeled and cubed and
1 pound zucchini, cubed ( I used yellow squash because that is what I had)
Cook 10 to 12 minutes.

Remove eggplant and zucchini to a plate and reduce heat to medium-high.
Add 2 tablespoons olive oil
1 1/2 cups sliced onions
Cook, stirring, until the onions are slightly softened.
Add:
2 large red bell peppers, cut into 1-inch squares (I only had green peppers) and
3 garlic cloves, finely chopped
(I also added about a cup of sliced mushrooms at this point-just because!)
Cook, stirring occasionally, until the vegetables are just tender but not browned, 8 to 12 minutes.
Season with salt and pepper to taste.
Add 1 1/2 cups peeled, chopped fresh tomatoes or one 14-ounce can diced tomatoes, drained
and 2 to 3 sprigs fresh thyme (these were in my garden!) or 1/2 teaspoon dried thyme and
1 bay leaf.
Reduce the heat to low, cover, and cook for 5 minutes.
Add the eggplant and zucchini and cook until everything is tender, about 20 minutes more. Taste and adjust the seasonings. Stir in: 1/4 cup chopped basil and sliced black olives, if desired. Doesn't it look pretty?
As you can see I also added mushrooms which gave the dish a "meatier" flavor. I was very surprised at how well my family loved this all vegetable dish.

Black Bean Chili with Red Onion Salsa


This is one of our favorite cold weather recipes. I found this when I was looking for a good black bean soup recipe as I wasn't too thrilled with the one I usually made. I'm thinking I could make this in the crockpot next time :)


A couple of notes on this recipe: If you don't think you would like lots of salsa on your chili, you can halve the ingredients for the Red Onion Salsa. I've also used it to top brats, burritos, or to mix with scrambled eggs. Okay, on to the recipe.

Black Bean Chili

4 cups dried black beans
5 to 6 cloves garlic, crushed
2 teaspoons ground cumin
2 1/4 teaspoons salt
Black pepper, to taste
2 teaspoons dried basil
1/2 teaspoon dried oregano
Crushed red pepper or cayenne, to taste
1 tablespoon lime juice
2 medium-sized green bell peppers, chopped
1/2 cup tomato puree
2 (4-oz.) cans diced green chilies
Red Onion Salsa
Grated cheese and sour cream


  1. Soak the beans in plenty of water for several hours or over night. Drain off the soaking water, and cook in fresh boiling water, partly covered, until tender. Check the water level during cooking; add more as necessary. Transfer the cooked beans to a large kettle or saucepan. Include about 2 to 3 cups of their cooking water.

  2. In a heavy skillet, saute garlic, seasonings, lime juice, and bell peppers in olive oil over medium-low heat until peppers are tender.

  3. Add the saute to the cooked beans, along with tomato puree and canned green chilies. Simmer, covered, over very low heat, stirring every now and then for about 45 minutes. (Make salsa at this time.)

  4. Serve topped with Red Onion Salsa, grated cheese, and sour cream.
Red Onion Salsa
2 cups chopped red onion
1/2 cup packed minced fresh cilantro
2 cups minced fresh ripe tomatoes
1/2 teaspoon salt
1 cup packed minced fresh parsley
Black pepper, to taste

Combine all ingredients and mix well. For a finer consistency, give the mixture a brief whirl or two in a food processor or blender.

6 to 8 servings

I usually serve this with the Red Onion Salsa, sour cream or Greek-style yogurt, and tortilla chips.

Tuesday, January 25, 2011

Make Your Own Syrup

There is nothing on a cold morning like a hot breakfast. Take pancakes or waffles-so good. You can feed a whole crowd on not a lot of money and they are filling, too.


Over the Christmas holidays while our youngest daughter was home from college I made whole wheat pancakes and on Christmas morning we had french toast made from banana bread-delish!


I remember a couple of years ago my daughter asked if we could make some pancakes or waffles for breakfast and I realized we were out of syrup. I then remembered that I had recently found a recipe for making my own syrup. I got my recipe binder out for sauces, found the recipe and got to work. It was just a matter of throwing some ingredients into a saucepan, heating them up, and you're set. We found out that we like this new recipe for syrup than what we used to buy.


Make Your Own Syrup


3 cups sugar
1 1/2 cups water
3 tablespoons molasses
1 teaspoon vanilla
2 teaspoons butter flavoring (optional)
1 teaspoon maple flavoring


Bring all the ingredients to a boil in a large saucepan, stirring until the sugar dissolves. Turn off the burner but leave the saucepan on it until the bubbling stops (you don't want to get burned!)

It is then ready to use if you like your syrup warmed, which I do. It will thicken a little as it cools. I keep mine in glass jars in the refrigerator.

Chile-Cilantro Grilled Chicken

I wish I had a picture of this dish for you. Better yet, I wish you could taste it and see how very delicious it is. I've made this once using skinless, boneless chicken thighs because that's what I had. It was also in the middle of January, so I used my cast iron grill pan to cook them on inside. The important thing is the rub you put on the chicken that just bursts with flavor. So good!

Chile-Cilantro Grilled Chicken

1/4 cup finely chopped cilantro
3 tablespoons minced garlic
1 tablespoon minced jalapeno chile
1 tablespoon grated lime peel
1 tablespoon olive oil
1 tablespoon chili powder
1 tablespoon ground cumin
3/4 teaspoon salt
4 bone-in skin-on chicken breast halves

Heat grill. Combine all ingredients except chicken in small bowl. Generously rub over chicken and under skin. Grill, covered, over medium heat or coals 14 to 18 minutes or until no longer pink in center, turning once.

4 servings
For those of you interested, this dish contains per serving: 235 calories, 11.5 g total fat (2.5 g saturated fat), 28 g protein, 4.5 g carbohydrate, 75 mg cholesterol, 525 mg sodium, 1 g fiber

This is a recipe I got from the Cooking Pleasures magazine many years ago when I belonged to the Cooking Club of America.

I'm linking up with Tasty Tuesday.

Monday, January 24, 2011

Foolproof Roast Beef


Most cooks are familiar with the Joy of Cooking cookbook, but I wasn't until a few years ago. I had seen the title at the library, in bookstores, and in other people's kitchens, but I had never looked inside. I knew it was very popular and that cooks have been using it to cook for decades. When I joined a cookbook club about a year ago I decided to give it the Joy of Cooking a try, and I'm really glad I did. It is my new favorite because it has just about any answer to any question you might have about how to cook a particular kind of food and how a certain food is used in cooking. This edition was published in celebration of its 75th Anniversary when a widow by the name of Irma Rombauer self-published the cookbook, using her own savings to do it. Her daughter joined in and helped her with illustrations and recipe testing. Irma's grandson now heads up the publishing of JOC. I love it when families work hard to share in a project like this. It would take me a lifetime to try all the recipes in this book (not that I'm going to try!) but I know if I have doubts about how to cook a particular food, I can usually find the answer in this one.

My most successful result of a recipe is for Roast Beef. It comes out perfectly every single time. A meat thermometer is essential for this recipe, so I recommend you get one before even trying it. The other important thing is to set your oven on the high temperature it calls for. My oven only goes up to 500 degrees but it's enough. It really does make a difference. I have used a sirloin tip roast and an eye of round roast for this recipe.

Roast Beef

These directions are for the large, tender cuts we think of as Sunday dinner roast beef. Count on 2 servings per pound for bone-in roasts, 3 servings per pound for boneless roasts. The most tender are the standing rib roast and the rolled rib roast. The sirloin tip roast, eye of round, or rolled rump may be cooked the same way.

Preheat the oven to 550 degrees. Having removed the roast from the refrigerator 2 hours before, place the meat fat side up on a rack in a greased shallow roasting pan. Do not cover, and don't add liquid. Put the roast in the oven, immediately reduce the heat to 350 degrees and roast 18 to 20 minutes to the pound for medium-rare. A rolled roast will require 5 to 10 minutes longer to the pound. A thermometer should read between 125 degrees and 130 degrees for rare and 135 degrees and 140 degrees for medium. Let rest. Carve.

Salmon Burgers with Caesar Slaw

Canned salmon is one of my pantry staples and I usually stock up on it when it is on sale. It is wild salmon, which is full of the Omega-3 that we need and this is one way I can get nutrition into my family's meals without breaking the bank. I found this recipe for Salmon Burgers with Caesar Slaw from Rachael Ray and we love all the bold flavors in this dish. You can go here for the original recipe from Food Network.
I also have it written out with some variations of my own below. My added notes are in italics.

Salmon Burgers with Caesar Slaw

1 (14-0z) can Alaskan salmon, drained and flaked
2 egg whites, lightly beaten (I've also used 1 whole egg)
Handful parsley leaves, finely chopped (I've used dried parsley)
2 lemons, zested and juiced, divided (The lemon juice and zest adds a wonderful flavor to the patties)
3 cloves garlic, finely chopped
3/4 cup Italian bread crumbs, 3 generous handfuls
Salt and pepper (Easy on the salt! Anchovies have alot of salt in them)
4 anchovies, finely chopped, optional (If you like Caesar dressing, use at least 2)
2 teaspoons Dijon mustard
1 tablespoon Worcestershire sauce, eyeball it
2 tablespoons plus 1/4 cup extra-virgin olive oil, divided
Couple handfuls grated Parmigiano-Reggiano or Romano
2 hearts romaine lettuce shredded
1 head radicchio, shredded (my family doesn't care for this, so I just use romaine or other some lettuce)

To flaked salmon, add egg whites, parsley, the zest and juice of 1 lemon, 2/3 of the total amount of chopped garlic (about 2 teaspoons), the bread crumbs and lots of black pepper and a little salt. Mix together and form 4 large patties or 8 mini patties.

To a salad bowl add the remaining zest and lemon juice, remaining garlic, chopped anchovies, Dijon mustard and Worcestershire. Whisk in about 1/4 cup extra-virgin olive oil and cheese. Add lots of black pepper and no salt. Add shredded lettuces to the bowl and toss to coat evenly. Now, season the slaw with salt to taste, if necessary.

Preheat 2 tablespoons of extra-virgin olive oil, 2 turns of the pan, in a nonstick skillet over medium to medium-high heat. Cook salmon patties 2 to 3 minutes on each side for mini patties, 4 minutes on each side for large patties.

Serve salmon patties atop Caesar Slaw.

Arroz con Pollo

I'm not sure where I got this recipe but I've made it a few times and my family loves it. It's a easy one-dish recipe, which makes me wonder why I don't make it more often. As usual, I make the recipe according to what I want to change or add to it, to make it the way my family would like or what I have on hand. Since red bell peppers are so expensive during the winter, I usually buy them when they are cheap in the summer from a local farm stand, chop them up, and put them in small bags in the freezer. I have made this recipe with and without the 2 ounces of ham.

Arroz con Pollo

1 Tablespoon olive oil
4 chicken thighs
4 chicken drumsticks
2 teaspoon salt
1/2 teaspoon pepper
2 oz. smoked ham, cut into 1/4-inch dice
1 small onion, chopped
2 cloves garlic, minced
1 red bell pepper, chopped
1 green bell pepper, chopped
1 3/4 cups canned tomatoes, drained and chopped
1 tablespoon tomato paste
2 cups canned chicken broth or homemade stock
1 cup rice, preferably long-grain
2 tablespoons chopped fresh parsley

In a large, deep frying pan, heat the oil over moderately high heat. Season the chicken with 1/4 teaspoon each of the salt and pepper. Cook the chicken, turning, until well browned, about 8 minutes in all. Remove. Pour off all but 2 tablespoons of the fat from the pan.

Reduce the heat to moderately low. Add the ham, onion, and garlic to the pan and cook, stirring occasionally, until the onion starts to soften, about 2 minutes. Add the bell peppers and cook, stirring occasionally, until they start to soften, about 3 minutes longer.

Add the tomatoes, tomato paste, broth, and the remaining 1 3/4 teaspoons salt and 1/4 teaspoon of the pepper and bring to a simmer. Stir in the rice and add the chicken in an even layer. Simmer, partially covered, over moderately low heat until the chicken and rice are just done, 20 to 25 minutes, adding more broth if necessary if the rice isn't completely tender but has soaked up all the liquid. Sprinkle with parsley and serve. Serves 4.

Monday, January 17, 2011

Creamy Pinto Beans

This is our favorite way to cook pinto beans. They are good on their own, over rice, with cornbread, or anywhere else I use pintos. I also mash them to make refried beans.
3 cups dry pinto beans, soaked overnight
1 chopped onion
3 tablespoons bacon fat or butter
hot water
Salt to taste

Drain soaked beans. Put beans, onion, bacon fat or butter, and hot water to cover into slow-cooker for 4 hours on high or 6-8 hours on low. Add salt to taste.

Rick's Huevos Rancheros


After making a large crockpot full of Creamy Pinto Beans and finding some chorizo in the freezer, my husband suggested this dish. It is loosely based on Huevos Rancheros, which has no meat or beans in it, but the chorizo gave it a wonderful flavor and an added richness to the dish. And the beans, well, they are just so good, I couldn't leave them out. Just one of these was very filling. If you can't find chorizo in your grocery store, here is a recipe for it that you may want to try.
And if you want to serve 4 people, just fry up 2 more corn tortillas and 2 more eggs, and you're good to go.

Rick's Huevos Rancheros


2 corn tortillas

Oil for frying

Creamy Pinto Beans, mashed or 1 can refried beans

Salsa, store-bought or homemade

cilantro, chopped

2 eggs

Chorizo, 1/2 pound

Chopped onion, about 1/4 cup

Shredded cheddar cheese


Start by cooking the chorizo and chopped onion in a skillet until the chorizo is completely cooked and the onion is soft. Set aside.

In a small saucepan heat the beans and mash with a potato masher (if using a can of refried beans, just heat them).

In another skillet heat the oil, just enough for frying the corn tortillas. When the oil is hot fry the corn tortillas until crisp. Drain almost all of the oil from the skillet and fry the eggs over easy or sunny side up.

To assemble:

Put the fried corn tortilla on a plate. Spread on beans, then a little chorizo, one egg, some salsa, chopped cilantro, and cheese. Enjoy!

Serves 2.

I'm linking up with Tempt My Tummy Tuesday and Tuesdays at the Table.

Thursday, January 13, 2011

Pot Roast Milano

A repost from my other blog.
I had a yummy-looking picture but it was somehow deleted from my camera before I could download it onto my computer, so you will have to use your vivid imagination for this one.

Chuck roasts were on sale for $1.88 per pound this past week, which is unheard of these days around here, so I bought three of them. I've been making this recipe since my girls were small and it's a favorite. I almost always have all the ingredients (except the meat) on-hand so I rarely have to plan this meal.

Pot Roast Milano

2 tablespoons oil
3 to 4-lb pot roast
1 teaspoon salt
1/2 teaspoon celery salt, if desired
1/2 teaspoon basil leaves or Italian seasoning
1/4 teaspoon pepper
1 large onion, sliced
1 garlic clove, minced
1 cup Burgundy or dry red wine (I used beef broth)
8-oz. can (1 cup) tomato sauce
2 tablespoons flour
1/2 cup water

In large skillet or Dutch oven, brown meat in hot oil. Combine salt, celery seed, basil, pepper, onion, garlic, wine (or broth) and tomato sauce; add to meat. Simmer covered 2 1/2 to 3 hours or until tender. Remove meat to platter. Combine flour and water; stir into liquid in pan. Heat until mixture boils and thickens, stirring constantly. If necessary, thin with additional water. Spoon sauce over pot roast. Serve with spaghetti, buttered noodles, or mashed potatoes. Makes 6 to 8 servings.

Experimenting with Sticky Chicken

This is a repost from my other blog.
About a year ago I posted a recipe for Roasted Sticky Chicken. It is really tasty but sometimes it has been turning out rather dry, so I thought I would play with the recipe a little and do some adjusting. Last week my husband and I were grocery shopping and found 2 large roasting chickens for 69 cents a pound as a manager's special. (We always, always look for these bright orange stickers on meat for huge discounts!) They were very large, much larger than the fryers I usually buy at Aldi for 79 cents a pound. Here is the original recipe for the Sticky Chicken.

Roast Sticky Chicken

4 teaspoons salt
2 teaspoons paprika
1 teaspoon cayenne pepper
1 teaspoon onion powder
1 teaspoon thyme
1 teaspoon white pepper
1/2 teaspoon garlic powder
1/2 teaspoon black pepper
1 whole chicken
1 cup chopped onion

In a small bowl, thoroughly combine all the spices. Remove the giblets from the chicken, clean the cavity well, and pat dry with paper towels.
Rub the spice mixture into the chicken, both inside and out, making sure it is evenly distributed. Place in a resealable plastic bag, OR, place in the roasting pan, and refrigerate overnight.
When ready to roast the chicken, stuff the cavity with the chopped onions and place in a shallow roasting pan. Roast, uncovered, at 250 degrees for 5 hours. After the first hour, baste the chicken occasionally (about every half hour or so) with the pan juices. The pan juices will start to caramelize on the bottom of the pan and the chicken will turn a golden brown. If the chicken has a pop-up thermometer, ignore it. Let the chicken rest for 10 minutes before carving.

I still do everything as the recipe suggests, however, this last time I doubled the spices and prepared the 2 roasters for the next day. I put them in the refrigerator, one in my crockpot and one in a roasting pan, covered. The next day I put the chopped onion in the cavity of each chicken and started the cooking. I also added a little water to the bottom of the crock pot. I put the crock pot on low and let it slowly cook away for about 8 hours.

About 4 hours before we wanted to eat the roasted chicken, I added a little water to the bottom of the pan, covered it with foil and put it in the oven, basting every once in awhile. About halfway through the cooking time, I uncovered it and let it continue cooking.

With the addition of the water at the bottom of the pan, both methods of cooking turned out very, very well. I like the crock pot method the best, though because I didn't have to do any basting or checking, although it does take twice as long as the roasted method.

*You may want to adjust the cooking time according to the size of your chicken. These roasters were large, about 5 pounds apiece, and fryers are usually about 3 1/2 pounds. Test your chicken for doneness in the following ways: using a meat themometer; if the juices run clear; or if the leg moves easily when you wiggle it.
I'm linking up with Friday Potluck

Tuesday, January 11, 2011

Lentils Are the Budget-Minded Girl's Best Friend

There's nothing glamorous about lentils. They are cheap, bland on their own, and have been around for thousands of years.

They aren't attached to the most pleasant story from the Bible, either. Lentils was the dish that Jacob gave to Esau in exchange for his birthright. Esau was so hungry from a day of hunting that he was willing to trade one bowl of these legumes for his birthright, the blessing that only the eldest son could receive from his father.

So, why have they been around for so long? There must be something to them that gives them this longevity. People today still eat them regularly.

I wasn't real familiar with lentils until I was married. We had a bone from a leftover ham and my husband asked me if I would make some lentil soup like his mom used to make. I went to the store and picked up a small bag of lentils for the first time, brought them home and with the help of my husband made a very good soup. That was about all I did with lentils for about 20 years.

Then I started seeing how using this little legume was good for our grocery budget. I read blogs and recipe sites on the Internet and found out that people were using them in place of meat sometimes. So, I started using them in different recipes. Some we loved, others we didn't care for. I've even learned how to make lentil soup without the ham bone. Here's a few that we make regularly.

Oh, and the best part of all is the fact that they are a quick-cooking legume. No soaking!

Lentil Soup
Make sure you have a nice loaf of crusty bread for dunking!

3 cups dry lentils
7 cups water (For more flavor, you could use chicken, beef, or vegetable broth instead)
2 teaspoons salt
6 to 8 medium cloves garlic, crushed
2 cups chopped onion
2 medium carrots, sliced or diced
1 teaspoon basil
1/2 teaspoon thyme
1/2 teaspoon oregano
Lots of black pepper
2 to 3 medium-sized ripe tomatoes or 1 large can diced tomatoes
red wine vinegar to drizzle on top

Place lentils, water, and salt in a large pot or Dutch oven. Bring to a boil, lower the heat to the slowest possible simmer, and cook quietly, partially covered, for 20 to 30 minutes. Add the vegetables, except the tomatoes, herbs and black pepper. Partially cover, and let simmer another 20 to 30 minutes, stirring occasionally.

If you are using fresh tomatoes, you will need to peel them: Heat a medium saucepanful of water to boiling. Drop in the tomatoes for 10 seconds, then take them out, peel off the skins, and squeeze out the seeds. Chop the remaining pulp and add to the soup. Otherwise, add the can of tomatoes, but make sure the lentils are tender first. The acid from the tomatoes can hinder the lentils from getting soft.

Cook another 5 minutes to heat through and serve hot with a drizzle of vinegar on top.
Makes 6 to 8 servings and freezes very well.
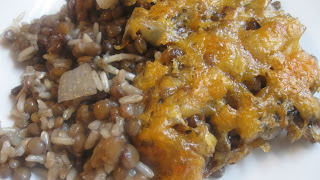


Lentil-Rice Casserole
This is good as a side dish or a main dish and I've seen it on many websites. I can't believe how much my husband likes this one. It's good with a big green salad. This would probably work very well in the crockpot, too.

3 1/2 cups chicken broth
3/4 cup lentils, uncooked and rinsed
1/2 cup brown rice, uncooked
3/4 cup chopped onion
1 clove garlic, minced or 1/4 teaspoon garlic powder
1/2 teaspoon basil
1/4 teaspoon oregano
1/4 teaspoon thyme

Blend all together in a casserole dish. Bake, covered, for 1 1/2 hours at 300 degrees. During the last 20 minutes, top with 1/2 cup grated cheddar cheese.

Lentil Cakes

1 1/2 cups cooked lentils
1/3 cup minced red or white onion
1 tablespoon fresh parsley
1/4 teaspoon salt
1/8 teaspoon pepper
Dash cayenne pepper
1 egg, lightly beaten
Dry bread crumbs
Oil

Mash lentils and mix well with the onion, parsley, and seasonings. Chill well and form into 6 flat patties. Dip in the egg and coat well with bread crumbs. Let dry on a wire rack for a few minutes. Brown well on both sides in a little oil, turning only once.

Friday, January 7, 2011

Our Favorite Granola Recipes


I recently tried a new recipe for granola and it turned out badly, although I followed the directions exactly, so I've decided that I'm going to stick with my tried-and-true recipes, both of which I got from the Hillbilly Housewife website years ago. Each recipe makes enough for a small family so if you have lots of people at your house that love granola as much as we do you could double these recipes and make them in two pans instead of one. I like that these recipes are very simple ones, too, with no special or expensive ingredients.

Granola is delicious with milk poured over it for breakfast or with a dollop of yogurt on top. Either way it is very filling and will stay with you all morning. It's also a nice alternative to hot oatmeal in the morning. And, I promise that these recipes are so much better than anything you could get from the store :)

Peanut Butter Granola

2 tablespoons butter or margarine
1/3 cup natural peanut butter (you can use regular peanut butter, too)
1/3 cup honey
1/2 teaspoon vanila
1/4 teaspoon salt
3 cups rolled oats (quick oats work, too)
1/2 cup raisins (optional)

Begin by melting the butter and peanut butter together in a large saucepan. Add the honey, vanilla, and salt. Stir the mixture until it is smooth and hot throughout. It doesn't need to boil. Add the oats and stir until they are completely coated. It will be chunky. TUrn the mixture out onto a cookie sheet or a 9 x 13-inch pan. Spread the granola out evenly and bake at 375 for 10 minutes. Add the raisins and mix together. Cool in the pan or on wax paper and transfer to a sealed container or large baggie.

Honey Granola

3 cups oats
1/2 cup butter or margarine (1 stick)
1/2 cup honey
1/4 teaspoon salt
1/2 cup each nuts and dried fruit (optional)

In a large saucepan, melt the butter over medium heat. Add the honey and salt. When nicely combined and melted together, add the oats and mix together until the oats are coated. Turn the mixture onto a cookie sheet or 9 x 13-inch pan. Spread the granola out evenly and bake at 375 for 10 minutes. It should be a nice golden brown. Allow it to cool in the pan and then add the nuts and fruit if using. Store in a sealed container or large baggie.
Posted by Picasa

Sunday, January 2, 2011

Pork Chops With Mustard Sauce


My husband is a dipper. Just about every piece of meat I serve has to be accompanied by some kind of sauce at the table, whether it is soy sauce, ranch dressing, BBQ sauce, steak sauce. He loves to mix his sauces and create his own, too. You name it, he loves it. So, when I have the opportunity I like to make a sauce to go with our dinner that doesn't come out of a bottle. I have made this recipe a couple of times now and it is so flavorful and delicious.

Word of caution: Don't overcook your pork chops. There's nothing worse than a dry piece of meat. You want the pink inside to be gone but it doesn't have to be white and dry inside. When you take your pork out of the pan it will continue to cook a little, so take that into consideration. Cut into your chop if you have to to make sure it is done (I've done this many times). If it is, great; if not just put it back into the pan and allow it to cook further for another minute or two.


Pork Chops, with Mustard Sauce

4 pork chops about 1 1/2 inches thick (if your chops are thinner, don't cook as long)

1/4 teaspoon salt

1/4 teaspoon pepper

2 tablespoons flour

3 tablespoons oil

4 garlic cloves, minced

1/2 onion, chopped

2 teaspoons dried thyme

2 teaspoon dried rosemary

3/4 cup chicken stock

2 tablespoons Dijon mustard

1 tablespoon chopped fresh Italian parsley (optional)

Sprinkle both sides of the pork chops with the salt, pepper, and flour. Heat 2 tablespoons of the oil in a large skillet set over medium-high heat until it is sizzling (you want it good and hot!). Cook the pork chops for 3 to 4 minutes on each side until browned. Transfer to a plate and set aside. Add the remaining 1 tablespoon of oil to the same pan. Add the onion, thyme and rosemary and cook for a couple of minutes. Add the garlic and cook another couple of minutes. Add 1/4 cup of chicken stock and boil until its reduced a little, about 3 to 4 minutes. Stir in the rest of the chicken stock and bring to a boil. Add the Dijon mustard and parsley, if using. Return the chops and any accumulated juices to the pan and cook for another couple of minutes to warm the porkchops and thicken the sauce. Transfer the chops to a serving plate and either top with the sauce or serve the sauce separately. Serves 4.

I'm linking up with Grocery Cart Challenge's Recipe Swap