Sunday, December 26, 2010

Christmas Day and Turtle Cheesecake

Christmas Day was so much fun for this grandma! All of my kids were here.


Jaclyn and Lorelei are new BFFs (Best Friends Forever)

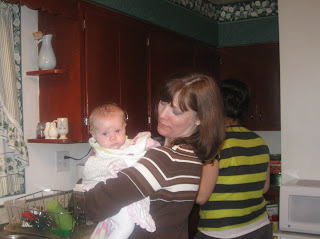
Lydia enjoyed being held by anyone as long as she had her pacifier and someone to cuddle with :)

Our sweet girl


Noah slept through it all

We had lots of good food, too, of course, and this was our dessert Turtle Cheesecake. Turtles are probably my favorite candy so I knew I would love cheesecake made from the same ingredients.
I was right!
I adapted the recipe from the inside of a Philadelphia cream cheese package.
Turtle Cheesecake
2 cups chocolate cookie crumbs
6 tablespoons butter, melted
1-14 oz bag of caramel candies*
1/2 cup milk
1/2 cup pecan halves
3 packages (8 oz. each) cream cheese, softened
3/4 cup sugar
1 tablespoon vanilla
3 eggs
2 squares semi-sweet baking chocolate*
Preheat oven to 325 degrees. Double-wrap with aluminum foil a 9- or 10-inch springform pan.

Mix the crumbs and the butter and press into the bottom and 2 inches up side of a 9-inch springform pan. Place the caramels and milk in a small microwavable bowl. Microwave on HIGH 3 minutes or until caramels are completely melted, stirring after each minute. Pour 1/2 of the caramel mixture into the crust. Refrigerate 10 minutes. Set remaining caramel mixture aside for late use.
Beat the cream cheese, sugar and vanilla with an electric mixer on medium speed until well blended. Add the eggs one at a time until blended. Pour over the caramel mixture in the crust.
**Place your double-wrapped in foil springform pan in a larger pan (such as a roasting pan). Put enough water into the larger pan until the water is halfway up the side of the springform pan.
Place pans in the oven and bake for 1 hour 5 minutes to 1 hour 10 minutes or until center is almost set. Run a knife or spatula around the side of the springform pan to loosen the cake. Remove from the larger pan. Let cool completely and remove the foil and sides of springform pan. Chill in refrigerator at least 4 hours.
Place the pecan halves on the cake in any way desired. With the remaining caramel mixture, drizzle the cake in any decorative way you like. Melt 2 squares of the semi-sweet baking chocolate in a microwavable bowl on HIGH, stirring at least every minute until just until melted. Drizzle over the cake.
*If you don't want to do all the unwrapping of candies and the melting, you could certainly use caramel sauce that is used for ice cream. You could also use a chocolate sauce, too.
**This is how I bake all of my cheesecakes. They come out perfectly just about every time, without cracking.


Christmas Eve Food-It's All About the Appetizers!


Christmas Eve is always a much more casual affair than Christmas Day for us. It's about appetizers mostly and fun food. Our third daughter, Jessica, and our son-in-law, Rich, were here with my husband and I along with our home-from-college daughter, Jaclyn. We had a good time of eating, playing games, and watching a holiday movie.

My daughter, Jessica, made a new recipe called Jalapeno Popper Spread and it is so good and much easier than actually making jalapeno poppers, one of our favorite fun foods. We found that is was good warm and at room temperature. You can serve it with tortilla chips or crackers.

I made a cheeseball, which is nothing more than 8 ounces of cream cheese, softened, blended together with cheese spread (I chose Cheddar this year). I roll it into chopped walnut pieces wrapped in wax paper into a ball and chill until firm. We love this with crackers and it's a recipe that I learned from my mom.

My husband is a sandwich lover so I made my grandma's recipe for BBQ Pork (some people call it pulled pork) sandwiches with coleslaw. Since this is my dear Grandma's recipe I will give it it's own post later. My son-in-law asked me if my daughter (his wife) had the recipe for BBQ pork. I told him I would make sure she did! There's just nothing more affirming to a cook than for someone to ask for the recipe on a dish he or she has made.

Our dessert consisted of all the goodies we had made on our Baking Day, well, whatever was left :)

Our Christmas Baking Day

The preparations for Christmas were a whirlwind of activity for us, as I know it was for all of you, too. The baking, the shopping, the decorating, it's all pretty normal for everyone at this time of year. And, yes, I know that Christmas is past for the year 2010 but I do want to share things that made it special for us this year. I hope your Christmas celebrations were wonderful as well. I've already shared the best Christmas present this year for us-our new grandson.

Something that has become a tradition for us since our first daughter was married five years ago, we have set aside an afternoon before Christmas to do some baking together. It was a little different this year since our oldest daughter wasn't able to be with us. She just had our first grandson and he was in a Chicago hospital with some complications due to his birth, so she was with him. But, everyone else was able to be with us. Lydia joined me in the kitchen for some snuggling.

Lorelei enjoyed sampling all the goodies.

Jaclyn is showing off her artwork.


It was a very good time. We always make Sugar Cookies with icing and sprinkles, which are pretty traditional for lots of people. It's a must with us. My mom always made them, too. Over the years we've added some other recipes that we have learned to expect but we also try new ones, too.


Easy Oreo Truffles-These are incredibly good and just like the title of the recipe very easy. My daughter made them with the mint oreos this year, which takes these candies to whole new level!

Chocolate-Marshmallow Pillows-This was a new recipe for us and they are really delicious with the surprise marshmallow inside.

Pretzel Turtles-These were easy and lots of fun to make, something the kids would have fun helping with.

Paula's Loaded Oatmeal Cookies-These are my youngest daughter's specialty. She got the recipe a couple of years ago from the Food Network website and everybody that tastes these cookies loves them, even people that aren't crazy about oatmeal cookies. They are that good.

White Chocolate Fudge-This fudge is so yummy-I love how the orange flavor comes through, and we found that dried cherries are just as good as the dried cranberries in this recipe. We've been making this for the last 3 or 4 years now.


And last but not least, we always make Chex Party Mix, the only savory treat that we make on our Baking Day. I love the microwave method which doesn't take as long and leaves room in the oven for our other goodies.


I will be sharing more about how we celebrated Christmas 2010 in future posts.

Friday, December 24, 2010

Merry Christmas!


The last week has been incredibly busy with the birth and delayed homecoming of our new grandson, shopping and wrapping of Christmas gifts, as well as the baking and cooking I have been and will be doing in the next day or so. Oh, I'm getting the house ready for company tonight and tomorrow, too. Whew! I should be totally wiped out but I'm very excited about all of my children and grandchildren being together tomorrow for Christmas Day.


I've wanted to do some posting on all the delicious goodies the girls and I have been making but time has gotten away from me, and we have made some really good things! I will be sharing some of the recipes in the next few days and I have totally been eating way too much (Yum!).


I hope each of my readers have a very Merry Christmas and a very Blessed New Year. May your days be merry and bright! And God's blessings on you!


Graphics courtesy of All Posters.

Monday, December 20, 2010

Babies!

I just wanted to pop in with a couple of pictures of our sweet babies. This is our newest, little Noah. He and his mommy and daddy are all on their way home finally! He is doing so well. They did an ultrasound on his brain this morning and everything is looking so good.
This is our other new grandchild, Lydia. I shared photos of her when she was first born but now she is 2 1/2 months old. She is already rolling over from tummy to back holds her head up on her own very well. She loves to be talked to and makes lots of cute baby noises.
I will be sharing more photos soon as Christmas Day approaches and everyone will be at our house. We are just so thankful that our new baby boy is healthy and doing so well. Thank you for all your prayers and well wishes.
I've been doing some cooking and baking but not as much as usual with all the baby activity lately. I will be back to posting more yummy things soon!

Friday, December 17, 2010

A Beautiful Grandson!

I just wanted to give the news about our new grandbaby. My daughter went to the doctor on Monday afternoon and the doctor was a little concerned that the baby would be pretty big and my daughter is not a big girl, and since her due date was on Sunday, they decided that she would be induced. We went in on Monday morning and did a first level round of inducement, which just meant that they would give her a very small dose of medication (I don't remember the name right now) to get her body ready for labor and to see if she would go into labor on her own. This lasted for 12 hours with 2 more doses. Nothing much happened.

She was then given pitocin and for the next few hours she was progressing pretty well. After 2 hours of pushing (!) our baby boy was born and not doing too well. The cord had been wrapped around his neck and he was blue. He was rushed to the team of pediatric workers, they got him breathing but they did want to do some testing. They found blood on his brain and was then transferred to a hospital in Chicago so that he could be watched by a neurosurgeon. Today, he seems to be doing pretty well. He is off the oxygen, eating and doing all the things a newborn should be doing. The blood on his brain is stable, which means it isn't growing, but he may still need surgery. My daughter and son-in-law are waiting for the neurosurgeon to examine him and tell them if surgery would be necessary.

We are, of course, hoping that he won't need surgery and that he will be able to come home soon. Your prayers would be greatly appreciated. By the way, his name is Noah Jonathan. He was 8 lb 4 oz and 21 inches and he is absolutely beautiful if I do say so myself :)

I will continue to update as I have news.

Sunday, December 12, 2010

Indonesian Ginger Chicken


Have you ever made a dish that was so good that everybody at the table was exclaiming over it and you just knew that it was a recipe you would be making again and again? Well, this is one of those recipes. So good, so sweet and tasty. This makes lots of chicken so you could definitely halve the ingredients or go ahead and make the whole recipe and freeze what is leftover for another dinner.

Indonesian Ginger Chicken

1 cup honey
3/4 cup soy sauce
1/4 cup minced garlic, about 8 to 12 cloves
1/4 cup peeled and grated ginger root
2 chickens (3 1/2 pounds each) or other in-bone chicken pieces equivalent to the same weight (thighs work really well)

In a small saucepan, cook the honey, soy sauce, garlic, and ginger root until the honey is melted and incorporated into the other ingredients. In a large roasting or baking pan, lay the chicken pieces in a single layer skin side down. Pour the sauce over the chicken pieces, cover tightly with aluminum foil and put in the refrigerator overnight.
The next day, preheat the oven to 350. Place the pan in the oven and bake for 15 minutes. Uncover the pan, turn the chicken skin side up, and raise the temperature to 375. Continue cooking for another 45 minutes or until the juices run clear and the sauce is a rich dark brown.
Posted by Picasa

Monterey Beans


I'm a big fan of bean and rice dishes but if there isn't much flavor it falls flat in my book so when I found the original recipe for Monterey Beans from the Urban Housewife I knew I had a winner. I've added garlic to the recipe and instead of using fresh tomatoes, which don't have much taste this time of year, I usually use canned diced or pureed tomatoes.
Monterey Beans

4 slices bacon, chopped or 1/2 pound sausage
1 cup chopped onion
1/2 cup chopped green pepper
1 cloved garlic, minced
2 cups cooked pinto beans
2 chopped tomatoes or 1 can diced or pureed tomatoes (it all works)
1/4 cup beef broth
1 teaspoon chili powder
1/2 teaspoon salt or to taste
1 cup shredded cheddar cheese

Saute the bacon or sausage in a little olive oil for a couple of minutes. Add the onion and green pepper and saute until the onion is translucent. Add the rest of the ingredients except the cheese and simmer for about 10 mintues. Add the cheese over low heat and stir until mixture is smooth, about 5 minutes. Serve over rice if desired. 6 servings.
Posted by Picasa

Tuesday, December 7, 2010

Creamy Mustard Meatballs


I found the original recipe for this on a blog a couple of years ago and what attracted it to me was not only the fact that it sounded so good, but it was a pretty quick recipe and made with ingredients that were almost always in my pantry or freezer. I've tweaked it a little to make it more the way we like it and it turned out so creamy and flavorful when I made it yesterday. The meatballs were very tender and moist. You could use ground beef with this dish instead of the turkey, too.

Creamy Mustard Meatballs

1 pound ground turkey
1 cup breadcrumbs
4 tablespoons chopped onion
Salt and pepper
2 tablespoons, plus 2 teaspoons mustard (I've used dijon and spicy brown mustard-regular mustard would work, too)
1/2 bag (8 oz) egg noodles
2 1/4 cups chicken or beef stock
3/4 cup sour cream
4 tablespoons cornstarch
Salt and pepper
Chopped parsley to sprinkle over the top as garnish

Mix together the following in a medium bowl: ground turkey, breadcrumbs, chopped onion, 2 tablespoons mustard, salt and pepper. Shape into meatballs and bake at 400 degrees on a lightly greased cookie sheet about 15 to 20 minutes.

Meanwhile, cook the egg noodles until just tender in boiling water in a large pot. Drain and set aside.

In a saucepan, whisk together chicken or beef stock, remaining 2 teaspoons mustard, and cornstarch until smooth. Bring to a boil until thickenened. In a small bowl, stir about 1 tablespoon of hot mixture into the sour cream. Turn the heat to low and stir in the sour cream mixture being careful not to boil, just heating through. Add salt and pepper to taste. Remove from heat and stir in the meatballs. Serve over the noodles and sprinkle with parsley. Serves 4.


I'm linking up with Tasty Tuesday, Tuesdays at the Table, and Tempt My Tummy Tuesday


Posted by Picasa

Monday, December 6, 2010

Menu Plan Monday and Waiting for Baby!

It's been quite awhile since my last post and I'm very sorry. I've still been cooking and trying to keep my freezer full of make-ahead food. I've been working a lot but now that my schedule has eased up a bit I can plan a little better for what we eat and have more time to share it with you.
I find that if I shop the specials and loss leaders, I almost always have the ingredients I need to make meals that we enjoy. Our freezer is pretty full right now, so I really won't have to do much grocery shopping for the month of December except for special holiday baking and our Christmas dinner on Christmas day. We have two freezers: one in the kitchen above the refrigerator and one in our basement that is the chest type. I made a list of everything that was in each freezer and will be working with what we have for our meals. Here's the menu plan for this week, that is if I'm not at the hospital with our oldest daughter and son-in-law-she is due to have her baby any day now!!

Monday-Indonesian Ginger Chicken and Stir-Fry Vegetables (I will be sharing these recipes later this week!)

Tuesday-Monterey Beans, a recipe I got from The Urban Homemaker years ago, served over brown rice, green beans

Wednesday-Mustard Meatballs (another new recipe!), noodles, salad

Thursday-Lentil Chili (from the freezer) and cornbread

Friday-Pizza with mushrooms, onion, and green pepper

I'm linking up with Menu Plan Monday at I'm an Organizing Junkie

Tuesday, November 23, 2010

Baked Zucchini Gratin


Some of our favorites, old and new usually end up on our holiday table, whether it's Easter, birthdays, Christmas, or Thanksgiving. I found the recipe for this dish on the back of a margarine box (back when I used margarine all the time) and I've been making it ever since. Not only do my kids request it regularly, it's easy and can be made ahead of time.

Slice your zucchini and onions thinly and place in an oblong baking dish. The more surface the vegetables cover, the more tender they will get. Use whatever you have. Pour half of your butter over the vegetables. Sprinkle with the mozzarella cheese.
Combine the remaining butter with the bread crumbs and the parmesan cheese. Bake at 350 for about 35-40 minutes or until the bread crumbs are a golden brown. Dig in!

Baked Zucchini Gratin

6 servings
1 medium onion, sliced thinly
2 pounds zucchini, sliced thinly
1/2 cup butter, melted and divided
2 cups shredded mozzarella cheese (8 ounces)
1/2 cup bread crumbs, seasoned with salt, pepper, and Italian seasonings, or use Italian bread crumbs
1/4 cup parmesan cheese

In a lightly greased 2 quart oblong baking dish, layer the onion and zucchini slices, drizzle with 1/4 cup of the melted butter. Sprinkle with the mozzarella cheese. In a small bowl, combine the remaining 1/4 cup melted butter with the bread crumbs and parmesan cheese. Sprinkle the crumb mixture evenly over the top. Bake at 350 for 35-40 minutes or until golden brown and the zucchini is fork tender.
Posted by Picasa

Wednesday, November 17, 2010

Everyone Has a Job To Do!


I'm always looking for ways to save time and/or money in the kitchen, so it's a pretty sure thing that you are, too, which is where kitchen tips come in. They may not be about cooking but they do have to do with the kitchen or eating. I wrote this one on my other blog a while back and thought it deserved it's own spot on my cooking blog, too!

My kitchen tip will save you (and me!) lots and lots of time cleaning up. Right now, in this particular season in your life, you may some little ones hanging on to your skirt as you try to move around the kitchen, getting a meal together or cleaning after preparing a meal. But, this season will not last forever, and those little cuties have a way of growing up really fast. In fact, it seems like only yesterday my own daughters were toddlers. Now my own daughter has a toddler of her own. Where has the time gone?

As our children get older, we moms should be doing ourselves a huge favor and teaching our children how to do things in the kitchen, and not just when we are there to supervise. As my own daughters grew, they each had a job to do, such as, helping to prepare the food, setting the table, clearing the table after we ate, washing dishes, putting dishes away, wiping down the counter, and other kitchen work. Most of the time, the above activities were a group effort and I would usually be there to make sure it was done correctly. I think most of us do things this way, especially if we have more than a couple of kids who are old enough to do any of these chores.

Even a toddler loves to help. Although my 16-month-old grand daughter isn't helping very much in the kitchen yet, she is learning to pick up her toys. She also helps her mommy by throwing away her little sister's diapers, and she loves to help put wet laundry into the dryer. We also give her a cloth so that she can "dust" and "clean." As she gets older, she will be learning to do more things and gaining more responsibility so that her mommy and daddy aren't still doing these things for her when she is in her teens! :/

But, I think we know when these skills that we have taught our children have really stuck and taken hold when we moms aren't there to make sure it gets done. It's when your daughter comes home at an unexpected hour from work and makes herself something to eat and when she is done, there is no evidence that she was ever in the kitchen. On the other hand, is there a gooey peanut butter and jelly knife stuck to the counter, with the peanut butter and jelly still left out? Or how about greasy splatters on the stove from the hamburger that was fried in the pan and the oily pan is sitting in the sink waiting for YOU to wash it? And, how about that microwave? You know, when the last person to use it didn't bother to put anything over the food and the top of the microwave is splattered with hardened, crusty food?

So, my Kitchen Tip for this week is to be consistent with your kids about their clean-up skills in the kitchen. When you come in from the grocery store, expecting the kitchen to be clean so that you are free to put away your food because your kids know that they always clean up after themselves, it just makes life easier. And, when it isn't done, calling them to the kitchen and having them get the job done right even though they were having such a good time playing outside. It's hard to look like the mean mom but it will be worth it later, I promise.

Thursday, November 11, 2010

Calico Beans


Since going back to work I'm learning to use my crockpot more and last week I cooked my dry beans in it to freeze for later. I also made this recipe that I got from Organized Everyday and it was a big hit with the whole family. I know there are lots of different ways to make this dish but I've never tried any of them before and since a fellow blogger recommended it, I thought I would give it a try. This recipe makes lots and lots so I usually make the whole batch and freeze the rest for another time, which will really come in handy to have when I need to focus on holiday meals in the next few weeks. My notes or variations on the recipe are in italics.

Calico Beans

1 pound of lean ground beef, (I had some already cooked in the freezer)
1 large onion, diced, brown these together and drain
1 dried bag of 15 bean mix: cook in pressure cooker until done
OR you can buy canned beans: 2 cans of kidney beans and 2 cans of garbanzo beans (or store them cooked and frozen in the freezer)

In the crockpot add:

Beef, onions, and beans plus
2 cans of baked beans (any brand)
1 cup of real bacon bits or fry your own (6 slices) (I fried the bacon and onion together)

1/2 c. ketchup
1/2 c. of brown sugar
1 T. vinegar
1 t. of prepared mustard
1 t. salt

Mix it all and cook on high for 2-3 hours or low for 4-6 hours
OR in the oven 350 degrees for 1 hour

If you choose to fry your own bacon, cooking it with the onions saves time..

If you do not have a pressure cooker, you can still cook your own dried beans in the crockpot, but you have to plan for this a day in advance. (I cooked the beans ahead of time and stored them in the freezer until I put them in the crockpot.)
This is really good with cornbread :)

Thursday, November 4, 2010

Sweet Potato Muffins with Cinnamon-Walnut Streusal


I recently found a recipe for Pumpkin Muffins with Cinnamon-Pecan Streusal and as I didn't have all the ingredients called for in the recipe, I used what I did have and still made a really good muffin. Please, don't skip the streusal topping-even if you have to eat this muffin as a dessert to make yourself feel less guilty about the butter and sugar :) This topping just makes the muffin! This recipe does make 18 muffins so I make the whole batch and put some in the freezer for later. I am building up a nice stockpile of baked goods in my freezer since I don't always have the time these days to bake when I want something good to eat-and homemade goodies are always better than store-bought to me.

Sweet Potato Muffins with Cinnamon-Walnut Streusal

Makes 18 muffins

1/2 cup oil
3/4 cup brown sugar
2 cups flour
1 tablespoon baking powder
1 teaspoon soda
1 teaspoon cinnamon
1/2 teaspoon nutmeg
1 teaspoon salt
2 eggs
1/2 cup milk
1 teaspoon vanilla
1 cup sweet potato puree

Streusal

1/2 cup flour
1/3 cup brown sugar
1 teaspoon cinnamon
4 tablespoons butter
3/4 cup chopped walnuts

Preheat oven to 350 degrees. Grease muffin tins or use cup liners.
In a large bowl, combine the muffin ingredients, wet ingredients first. Add the dry ingredients just until moistened. Fill the muffin tins with the batter.

For the streusal, in a small bowl, mix together the flour, brown sugar, and cinnamon. Cut into the mixture the butter until crumbly. Add the walnuts. Generously sprinkle streusal over each muffin. Bake for 21 to 23 minutes.

I'm linking up with Ekat's Friday Potluck

Saturday, October 30, 2010

Chicken and Dumplings

I've been making chicken and dumplings for years and years, thanks to my mom who gave me her old 1970's Pillsbury Cookbook when I was a young wife. I pretty much learned how to cook from that old cookbook and wish I still had it. Chicken and Dumplings is one of our family's favorites and it's another one of those good one-pot kind of dinners that are so easy on the cook.

Chicken and Dumplings

6 chicken thighs (This is just what I had on hand-you can use whatever chicken pieces you want, even boneless)
1/2 chopped medium onion
olive oil, butter, or chicken fat
2 carrots, sliced
chicken broth,
to cover the chicken
Salt and pepper
4 tablespoons flour
2 teaspoons poultry seasoning
Sprinkle the chicken pieces on both sides with salt and pepper. Melt the oil in the bottom of your Dutch oven over medium-high heat. Add the chicken and brown on both sides. Remove the chicken to a plate and add the onions and carrots to the pan for about 5 minutes, adding more oil if necessary. Also add the thyme and poultry seasoning. Sprinkle the flour in the bottom of the pan and stir well. It will form a paste. Add the chicken and broth. Let it cook until the chicken is tender but not falling off the bone. Taste your broth and add more thyme, salt and pepper as desired. Make sure the stew is softly boiling before adding the dumplings.

Fluffy Dumplings

1 1/2 cups flour
1 tablespoon minced parsley
(I didn't have parsley but I did have dried chives)
2 teaspoons baking powder
1/2 teaspoon salt
2/3 cup milk
2 tablespoons oil or melted butter
1 egg, slightly beaten

In a medium bowl, combine the first 4 ingredients. Stir in the remaining ingredients just until dry ingredients are moistened. Drop dough by tablespoonfuls onto hot chicken or meat in boiling stew. Cook covered, 12 to 15 minutes or until dumplings are fluffy and no longer doughy underneath.

I'm linking up with Tempt My Tummy Tuesday, Tasty Tuesday, and Tuesdays at the Table.

Thursday, October 28, 2010

Cracker Barrel Copycat Chicken Casserole

Cracker Barrel is one of my favorite places to eat. I love a good Southern meal and they deliver every time. I don't just love their food, but the whole atmosphere of the place. It's not just a restaurant but a country store, too. I had never had this particular dish there but I bet they make it pretty good! If you love a creamy, stick-to-your-ribs kind of dish you will love this casserole with a crumbly cornbread topping. I got this recipe from the Food Lion website and it was super delicious (my husband-not the biggest casserole fan-even loved it!).

Cracker Barrel Copycat Chicken Casserole

Cornbread

1 cup cornmeal
1/3 cup flour
1 1/2 teaspoons baking powder
1 tablespoon sugar
1/2 teaspoon salt
1/2 teaspoon baking soda
2 tablespoons oil
3/4 cup buttermilk (you can substitue 1 tablespoon vinegar or lemon juice and add enough milk to make 3/4 cup
1 egg
1/2 cup melted butter

Chicken Filling

2 tablespoons butter
1/4 cup chopped onion
1/2 cup celery sliced thinly
1 1/2 cup chicken broth
1 can cream of chicken soup ( I used some of my homemade from the freezer)
1 teaspoon salt
1/4 teaspoon pepper
2 1/2 cups chicken, cooked and cut into pieces

Cornbread

Mix all ingredients except the butter into the bowl until smooth. Pour into greased 8-inch square pan and bake at 375 for 20-25 minutes or until golden. Remove from the oven and cool until it can be handled. Crumble and place 3 cups of the cornbread into a mixing bowl. Add 1/2 cup melted butter and mix well. Set aside.

Chicken


In a saucepan or skillet over low heat, melt butter and sute onion and celery until soft. Add the broth, soup, salt and pepper. Stir until completely blended. Add the chicken and stir until it reaches a low simmer. Cook 5 minutes. Remove from the heat. Put the chicken mixture in a 2 1/2 quart casserole dish or individual dishes (about 4). Spoon the cornbread topping over the chicken mixture. Bake at 350 for 35-40 minutes or until crumbs turn golden brown and casserole bubbles.

I had some of the cornbread crumbles left over so I put them in a freezer bag and they are now sitting in my freezer for the next time I want to make a yummy casserole. I was thinking that I could also make my Chicken A La King and put the cornbread crumbs over it. What do you think?


I'm participating in The Grocery Cart Challenge Recipe Swap, Friday Potluck, and Foodie Friday

Saturday, October 23, 2010

Cheesy Cream of Cauliflower Soup


In my quest to not waste food that we aren't eating fast enough and because I always love a good soup, I made this creamy, cheesy, and satisfying soup. I had a head of cauliflower in the fridge that was just starting to go bad and knew this soup would be perfect. I adapted this recipe from my Joy of Cooking cookbook and it was so good. Broccoli could be subsituted for the cauliflower, too.


Cheesy Cream of Cauliflower Soup


4 tablespoons butter

1/2 cup chopped celery
1 cup chopped onion

1 1/2 pounds cauliflower (1 average head), trimmed and coarsley chopped

1/4 cups flour

4 cups chicken or vegetable stock

1/2 to 1 cup whole milk, half-and-half, or cream

Salt and pepper to taste

1 cup Cheddar cheese (Swiss would be good too!)


In a soup pot melt the butter. Add the chopped celery and onion, salt and pepper lightly, and saute until vegetables are tender but not browned. You just want to sweat them. Stir in the cauliflower, cover, turn down heat to low and steam for about 5 minutes, stirring occasionally. Stir in the flour, coating the vegetables. Turn the heat to high and stir in the stock and bring to a boil. Reduce the heat so that the liquid comes to a simmer, partially cover, and let cook until the cauliflower is very tender, about 20 minutes, stirring occasionally. Using a food processor, blender, or immersion blender, puree soup until smooth. Return the soup to the pot and stir in the milk, half-and-half, or cream. Heat through but do not boil. Add the salt and pepper and cheese, heating until the cheese is melted. Makes about 8 cups.


Thursday, October 14, 2010

Taffy Apple Salad

Although this is more of a dessert than a salad, it is light and refreshing. With apples in season right now and the holiday season coming up I thought this one would be good for sharing at a potluck or family dinner. We really love it!


Taffy Apple Salad

1 (20-oz) can chunk pineapple (save the juice)

1 tablespoon flour

1/2 cup sugar

1 cup whipped topping

3 medium to large apples, cored and cubed

1 cup chopped peanuts

4 cups mini-marshmallows

1 egg, beaten

1 tablespoon white vinegar


Open pineapple and drain juice into a medium saucepan. In a large mixing bowl combine pineapple chunks with marshmallows and set aside. In saucepan, add flour, sugar, beaten egg and white vinegar to juice and stir constantly over medium heat until it boils and thickens like a pudding consistency. Chill. Add chopped apples, marshamallows, and pineapple. Fold in the chilled mixture and whipped topping. Top with peanuts.* Refrigerate.


*The original recipe said to fold some of the chopped peanuts into the salad but they will get a little soggy if the salad isn't eaten the same day so we put them all on top. This recipe makes enough for a large family gathering and we had leftovers that still tasted good 3 days later when we finally polished it off. I had even sent some home with my married daughters.

Thursday, September 30, 2010

Lemon Greek Chicken


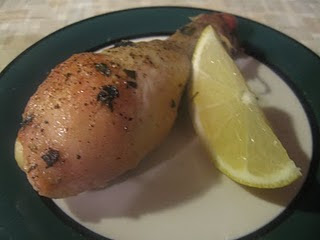
This is one of our favorite ways of making chicken. This lone drumstick was the last to be eaten, which I did as soon as the picture was taken. This recipe is so easy and has lots of flavor. The first time I made it was when my daughters and I made a Greek-inspired dinner for our family and this dish got the best reviews, so I knew it was a keeper. I've made it several times since then and like to pair it with roasted potatoes.

Lemon Greek Chicken

3-4 lb cut-up chicken pieces
2 tablespoons butter
1/4 cup olive oil
2 teaspoons salt
1/8 teaspoon pepper
1 tablespoon dried oregano
2 lemons, squeezed

Rub chicken with lemon juice and marinade for one hour. Place chicken in a roasting pan and pour the olive oil and melted butter over the chicken. Season with the seasonings. Roast at 350 degrees for 45 minutes to 1 hour.


Sunday, September 26, 2010

Cooking On A Shoestring Budget: Create Your Own Muffin

Blueberry and Lemon Muffins-mmmm!

I don't like wasting any of the food in my fridge, so I'm always glad to find recipes that help me use up the little bits of this or that. And, now, with just my husband and me in the house, it's more important than ever that I use up what we have. This recipe helps me do just that.


I love muffins, just about any kind. It's probably my breakfast of choice on any given morning and they are so portable! So good with coffee. When I first started making muffins, I always went strictly by the recipe in the cookbook. Then I found Amy Dacyczyn's Creating a Muffin recipe and I found that muffins are pretty flexible just as long as you go by the guidelines she sets out in her book, The Complete Tightwad Gazette, one of my favorite frugal sources. I have used this recipe many times and they have come out good just about every time. And, it feels good not to throw out food!


Create Your Own Muffin

Grains: Use 2-2 1/2 cups of white flour. Or substitute oatmeal, cornmeal, whole-wheat flour, rye flour, or flake cereal for 1 cup of the white flour. Or substitute 1 cup of leftover cooked oatmeal, rice, or cornmeal for 1/2 cup of the white flour and decrease liquid to 1/2 cup.


Milk: Use 1 cup. Or substitute buttermilk or sour milk (add 1 tablespoon of vinegar to 1 cup milk). Or substitute fruit juice for part or all of the milk.


Fat: Use 1/4 cup of vegetable oil or 4 tablespoons of melted butter. Or substitute crunchy or regular peanut butter for part or all of the fat. The fat can be reduced or omitted with fair results if using a "wet addition."


Egg: Use 1 egg. Or substitute 1 heaping tablespoon of soy flour and 1 tablespoon of water. If using a cooked grain, separate the egg, add the yolk to the batter, beat the white until stiff, and fold into the batter.


Sweetener: Use between 2 tablespoons and 1/2 cup of sugar. Or substitute up to 3/4 cups brown sugar. Or substitute up to 1/2 cup of honey or molasses, and decrease milk to 3/4 cup.


Baking powder: Use 2 teaspoons. If using whole or cooked grains or more than 1 cup of additions, increase to 3 teaspoons. If using buttermilk or sour milk, decrease to 1 teaspoon and add 1/2 teaspoon baking soda.


Salt: Use 1/2 teaspoon or omit if you have a salt-restricted diet.

The following ingredients are optional. Additions can be used in any combination, up to 1 1/2 cups total. If using more than 1 cup of wet additions, decrease the milk to 1/2 cup.

Dry additions: Nuts, sunflower seeds, raisins, coconut, etc.


Moist additions: Blueberries, chopped apple, freshly shredded zucchini, shredded carrot, etc.


Wet additions: Pumpkin puree, applesauce, mashed and cooked sweet potato, mashed banana, mashed and cooked carrot, and so on. If using 1/2 cup drained, canned fruit or thawed shredded zucchini, substitute the syrup or zucchini liquid for all or part of the milk.


Spices: Use spices that complement the additions, such as 1 teaspoon cinnamon with 1/4 teaspoon nutmeg or cloves. Try 2 teaspoons grated orange or lemon peel.


Jellies or Jams: Fill cups half full with a plain batter. Add 1 teaspoon jam or jelly and top with 2 more tablespoons batter.


Topping: Sprinkle cinnamon sugar on the batter in the tins.


Nonsweet Combinations: Use only 2 tablespoons sugar and no fruit. Add combinations of the following: 1/2 cup shredded cheese, 3 strips fried and crumbled bacon, 2 tablespoons grated onion, 1/2 cup shredded zucchini, 2 tablespoons Parmesan cheese. Spices could include a teaspoon of parsley and a pinch of marjoram.

Basic Recipe:

2-2 1/2 cups grain
1 cup milk
Up to 1/4 cup fat
1 egg
Up to 1/2 cup sweetener
2 teaspoons baking powder
1/2 teaspoon salt
Up to 1 1/2 cups additions

To make the muffins, combine the dry ingredients, and then mix in wet ingredients until just combined; the batter should be lumpy. Grease muffin tin and fill cups two-thirds full. Bake in a preheated oven at 400 degrees for 20 minutes (give or take 5 minutes).

The sky's the limit on this formula. No longer am I limited by what is in a recipe, I can use up whatever is in my cupboard or refrigerator.


Thursday, September 16, 2010

My Own Seasoning Mixes


I love putting together my own seasoning mixes. There's no MSG, no mysterious "spices" or "seasoning" added like in the packets or spice jars bought at the store, and, if I keep them ready-to-go in little jars, they are very convenient. I save little jars or containers from jellies or relishes or whatever else I buy at the store, or you could buy some little spice jars. I then attach the recipe for the spice mix right on the jar. That way, if I use the last of the seasoning mix, I don't have to go rummaging through my recipe book to find the recipe to make more. I can also make up the seasoning mix when it's convenient for me. Doubling and tripling the recipes also makes these really, really convenient.
Here are a couple of my favorites.
Grill Seasoning
I use this on chicken, pork, and beef. It's especially good on a nice steak.
3 tablespoons pepper
1 tablespoon salt
1 tablespoon onion powder
1 tablespoon garlic powder
1 tablespoon coriander
1 teaspoon crushed red pepper flakes
Taco Seasoning
I got this one from Sandra at Keeping It Simple. It tastes just like the taco seasoning packets from the grocery store.
1 tablespoon chili powder
1 1/2 teaspoon cumin
1 teaspoon black pepper
1 teaspoon salt
1/2 teaspoon paprika
1/2 teaspoon oregano
1/4 teaspoon garlic powder
1/4 teaspoon onion powder
1/ teaspoon cayenne pepper
1/4 cup water
You use this just like you would use the packets of taco seasoning. Cook your meat, add the seasonings and the water, and let cook for another few minutes. You can make this seasoning with 1 1/2 pounds raw hamburger or about 1 pound of cooked shredded beef, chicken, or pork.
I would also like to find a chili mix substitute. Any suggestions?

Tuesday, September 14, 2010

Oatmeal Drop Cookies


I've made these cookies many times and they are so good-not your typical oatmeal cookie-they're better! I originally posted this recipe on my other blog but I would like to get all my recipes and food tip type of posts over here with all the other food. I got this recipe from one of my favorite cookbooks, my 1950 Betty Crocker Picture Cookbook, which was republished in 1998. I've tweaked this recipe a little and they are just so good.

Oatmeal Drop Cookies

Mix together thoroughly:

1/2 cup soft shortening (I used 1/4 cup shortening, 1/4 cup unsweetened applesauce)
1 1/4 cups sugar (I used only 1 cup)
2 eggs
6 tablespoons molasses ( used 4 tablespoons)


Sift together and stir in:
1 3/4 cups sifted flour
1 teaspoon soda
1 teaspoon salt
1 teaspoon cinnamon


Stir in:
2 cups rolled oats
1/2 cup cut-up nuts
1 cup cut-up raisins

Drop rounded teaspoonfuls about 2 inches apart on lightly greased baking sheet. Bake until lightly browned.
Temperature: 400 degrees
Time: Bake 8 to 10 minutes
I'm linking up with Tempt My Tummy Tuesday and Tasty Tuesday

Sunday, September 5, 2010

Peppery Cheddar Biscuits


I love how these biscuits turn golden brown from the egg wash and are square instead of round, but you can make them round, too. You can also see the flecks of cheddar cheese throughout each piece and come out beautifully every time.

Peppery Cheddar Biscuits

4 cups flour
2 tablespoons baking powder
1/2 teaspoon salt
1/2 cup shortening
1/4 cup butter
1 1/2 cup finely crumbled or shredded sharp cheddar cheese (6 ounces)
2 to 3 teaspoons pepper (I usually use 2 teaspoons)
1 1/2 cups milk
1 egg, beaten
1/2 teaspoon water

Preheat oven to 400. Lightly grease a large baking sheet; set aside. In a large mixing bowl, stir together flour, baking powder, and salt.

Using a pastry blender, cut in shortening and butter until mixture resembles coarse crumbs. Add cheese and pepper; mix well. Make a well in the center of the dry mixture. Add milk all at once; stir until just moistened. Turn dough out onto a lightly floured surface. Knead dough 10 to 12 strokes until almost smooth.

Divide the dough in half. Roll or pat each half of dough into a 6-inch square, about 1 inch thick. Using a ruler or sharp knife, cut both squares of dough into 2-inch squares (or, cut squares of dough using a floured 2-inch biscuit cutter).

Combine egg and water. Brush the tops of biscuits with egg mixture. Place on prepared baking sheet. Bake for 13-15 minutes or until the biscuits are golden on top. Serve warm.

Makes eighteen 2-inch square or twently 2-inch round biscuits.

*Make ahead tip: To reheat biscuits baked earlier in the day, wrap them in foil and reheat in a 325 degree oven about 10 minutes or until warm.

Wild for Pumpkins!


This is a post that I wrote last November on my other blog and since I'm really looking forward to some fall cooking, I thought I'd repost these great pumpkin recipes here. I'm hoping to find some nice sugar pumpkins at my farmer's market again this year.

Last week I roasted a large pumpkin and 2 small sugar or pie pumpkins. Last year was the first time I had even attempted such a feat but it was easy once I got the huge think cut up. I have been told that sugar pumpkins are different from the kind of pumpkins jack-o-lanterns are carved from in looks and texture and now I believe it. There isn't as much pulp to the pie pumpkins and they are a slightly darker color after being cooked. If you would like to roast your own pumpkin in the future, you can to All Recipes for 3 different ways to cook your pumpkin. It really is easy to do. The result was that I had all this cooked pumpkin! What was I going to do with it?

The sugar pumpkin pulp I am saving for 2 pumpkin pies for our Thanksgiving dinner. This is the recipe I usually use for one pumpkin pie, which is adapted from Libby's Brand Famous Pumpkin Pie:

Pumpkin Pie
3/4 cup sugar
1/2 teaspoon salt
1 teaspoon ground cinnamon
1/2 teaspoon ground ginger
1/4 teaspoon ground cloves
(Instead of the individual spices, you can also use 1 3/4 teaspoons pumpkin pie spice)
2 large eggs
2 cups pumpkin (15 ounce can of pumpkin can be used here)
1 (12 ounce) can evaporated milk
1 unbaked 9-inch pie shell


Mix sugar, salt, and spices in a small bowl. Beat eggs in large bowl. Stir in pumpkin and sugar-spice mixture. Gradually stir in evaporated milk. Pour into pie shell.
Bake in preheated 425 degree oven for 15 minutes. Reduce temperature to 350 degrees, bake for 40 to 50 minutes or until knife inserted near the center comes out clean. Cool on wire rack for 2 hours. Serve immediately or refrigerate. Top with whipped cream before serving, if desired.

From the big pumpkin I have already made some yummy treats for us.
The first thing I made was 4 loaves of pumpkin bread, one of my family's favorites. This is pretty much the same recipe I've always used for the last 25 years, although I have tweaked it a little to make it more healthy. It's from my 1980's Pillsbury cookbook.

Pumpkin Bread

15 or 16-oz. can (2 cups) pumpkin
2 cups
1/2 cup oil
1/2 cup unsweetened applesauce
2/3 cup water
4 eggs
2 1/2 cups unbleached flour
1 cup whole wheat flour
2 teaspoons baking soda
1 1/2 teaspoons salt
1 teaspoon cinnamon
1 teaspoon nutmeg
1/2 teaspoon ginger


Heat oven to 350 degrees. Grease (not oil) and flour bottoms only of two loaf pans. In large bowl, blend first 5 ingredients. Beat 1 minute at medium speed. Add remaining ingredients; blend at low speed until moistened. Beat 1 minute at medium speed. Pour batter into prepared pans. Bake at 350 degrees for 60 to 75 minutes or until toothpick inserted in center comes out clean. Cool 5 minutes; remove from pans. Cool completely. Makes 2 loaves.

This next pumpkin recipe is a new one for me and my family went crazy over it, even the ones that aren't crazy for pumpkin anything! I got it from About.com in the Southern Food section. I will be making this one again. It was so moist and cream cheese-y.

Pumpkin Cake with Cream Cheese Frosting

2 cups sugar
1 cup vegetable oil
4 large eggs
2 cups all-purpose flour
2 teaspoons baking soda
2 teaspoons ground cinnamon
1/2 teaspoon ground ginger
1 teaspoon baking powder
1/2 teaspoon salt
2 cups pumpkin puree or cooked mashed pumpkin
cream cheese frosting, below
1/2 cup chopped pecans

Combine sugar, vegetable oil, and eggs in a large mixing bowl; mix well. Sift dry ingredients into a separate bowl; stir into oil mixture, beating well. Stir in pumpkin puree.

Pour batter into two greased floured 9-inch round layer cake pans or a 13-x9-inch pan. Bake at 350 degrees for 35 to 40 minutes or until toothpick inserted in the center comes out clean. If using round cake pans, turn out cake onto racks to cool. Frost pumpkin cake with cream cheese frosting and sprinkle with chopped pecans.

Cream Cheese Frosting
1/4 cup butter
1 package (8 ounces) cream cheese, room temperature
1 pound confectioners' (powdered) sugar, sifted
2 teaspoons vanilla extract
Combine all ingredients in large mixing bowl; beat well until smooth. Makes enough for 2-layer pumpkin cake or 13-x-9-inch cake.

The last recipe I tried was the Crockpot Lady's CrockPot Pumpkin Spice Latte Recipe, although I made mine over the stove. I couldn't wait 2 hours to try it! It was very good!

I still have lots of pumpkin in the freezer and I'm always looking for new recipes, so what do you use your pumpkin in? Please, share your favorites!


Friday, September 3, 2010

Cooking On A Shoestring Budget: Beans

Oh, you knew there would be a post about beans for saving money at the grocery store, didn't you? Beans are a great way to stretch the grocery budget and very nutritious to boot! I'll add some links to some of our favorite bean recipes at the end of the post.


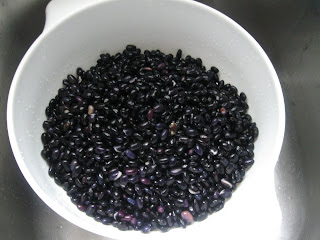
I want to show you how very easy it is to have some beans in your freezer. I cannot remember the last time I bought beans in a can because I find it to be just about as convenient, once I get them made, not to mention much cheaper, to buy them dried. For every 1 pound of dried beans you get in a bag, you get the equivalent of 4 (15-oz) cans! For example, I buy lots of black beans because they are our favorite for about a dollar per pound. A 15-oz can of black beans would cost about 75 cents each. For me, that's a savings of $2 that I can spend on something else that I really want to buy at the grocery store. There are 4 steps to taking dried beans from the bag to the freezer:


Empty the 1 pound bag of dried beans into a large bowl and cover with water. Make sure you have at least 2 inches of water above the beans. Leave overnight or at least 8 hours. In the morning they will be plumped up.


Drain them into a colander and rinse.


Put the beans in a slow-cooker and cover with water. Turn on low and leave all day until the beans are firm but tender. Let cool. Alternatively, you could put them in a large pot on the stove, bring to a boil, and let simmer for about 1 1/2 to 2 hours or so.


When the beans have cooled put them in some kind of container like glass jars or in baggies. I save jars from pickles, salsa, and jellies that I buy at the store and use those to freeze some of my beans. I do measure out how much I put in each jar and label them with the date so I don't have to try to remember how much I put in there later. Just remember to leave about 1 1/2 to 2 inches of jar space between the beans and the lid because they will expand as they freeze.


If you want to use baggies for storing, measure out about 2 cups of beans with their juice into a small sandwich bag, which is about 15 ounces. Lay it flat in the freezer so that it will freeze flat, which will save on storage space in the freezer. You can double up the baggies if you want OR you can put all the little baggies after they have frozen into a larger freezer bag.


Some dried beans are even more convenient because they don't have to be soaked, like split peas and lentils!


Here are some of our favorite recipes for using beans to give you some inspiration:


Black Bean and Salsa Soup-the easiest soup I've ever made!


I'm linking up with Frugal Friday.


Monday, August 30, 2010

Hawaiian Cheesecake

For my daughter's 22nd birthday this past weekend, she requested that I make Hawaiian Cheesecake. Her oldest sister had made it for us as a dessert a few months ago and it was a recipe we cheesecake lovers knew we wanted again. If you've never made a cheesecake before this is an easy one. There's no pre-baking the crust and everything goes together easily.

We adapted this one from the Better Homes and Gardens website but I have seen similar recipes for this cheesecake on other sites too.

Hawaiian Cheesecake

1 1/3 cups finely crushed vanilla wafers
1/2 cup flaked coconut
1/2 cup finely chopped toasted macadamia nuts (I couldn't find these so I used pecans, but you use what you like or eliminate the nuts altogether)
1/3 cup butter
2 (8-oz) packagages cream cheese, softened (don't skip this step-it must be soft or it won't cream together properly)
1 8-oz tub cream cheese with pineapple
1 cup sugar
2 eggs
1 egg yolk
2 teaspoons vanilla
1 teaspoon lemon juice
2 tablespoons coconut

Preheat oven to 350 degrees.
For the crust, crush the vanilla wafers and 1/2 cup nuts, if using. Combine the cookie crumbs, nuts, and coconut together. Melt the butter and combine with the mixture. Press onto the bottom and 1 inch up the sides of an ungreased 9-inch sprinform pan. Set aside.

In a large bowl, beat the cream cheeses until smooth. Add the sugar and beat until smooth. Add the eggs and egg yolk until just combined. Stir in the vanilla and lemon juice. Pour into the crust-lined pan. Place in a shallow baking pan and bake for 45 to 50 minutes or until the center appears almost set when gently shaken.

Cool in the pan for 15 minutes. Take a thin-bladed knife and loosen the crust around the sides of the pan and cool for 30 mintues more. Remove the springform pan sides and cool for another hour. Refrigerate until ready to serve.

To serve, sprinkle with toasted coconut. Makes 12 servings. We like to serve our cheesecakes with whipped cream, too.

Friday, August 27, 2010

Kitchen Happenings?


I haven't been cooking much this week except for making some Sticky Chicken that I've been making in the crockpot rather than the oven these days, and I did manage to bake a yummy loaf of French bread. My husband has doing most of the cooking these days. But, I will be trying a new to me cheesecake recipe for my daughter's birthday celebration this weekend. My oldest daughter has made it before and it was so good!

Wednesday, August 25, 2010

Packing Lunches and Cooking for Two


I will be taking my lunch with me to work these days, so having a list of different menus seemed like a good idea. Peanut butter and jelly can get old pretty fast, and since it's back-to-school time, many websites and blogs are focusing on just that subject. I found an extensive list of ideas over at the Hillbilly Housewife website that I will be printing out and hanging up on the side of my refrigerator where I keep my menu plan for easy access.
And, now that it's just my husband and me at home (we just dropped our last child off at college last weekend), and now that I'm working outside of the home, cooking will be a little different. For one thing, we just don't need to make as much food as we used to, and I won't be doing most of the cooking anymore. My husband likes to cook and this is a good time for him to get back into it. The crockpot will be a very valuable tool. I also plan on making double recipes of some of our favorite recipes and freezing the second half for future meals.
What are some of your favorite meals to make for the crockpot, for lunches, or for making ahead and popping into the freezer? This is a big change for us and I could sure use some ideas!

Tuesday, August 17, 2010

Cooking On A Shoestring Budget: Using Substitutions in a Recipe

One of my biggest secrets to keeping grocery cost down is learning to substitute ingredients in recipes. Since I keep my pantry stocked with ingredients rather than mixes and convenience foods this is usually not a problem. For example, for every square of chocolate that is called for in a recipe (an ingredient I don't always have) I can substitute 3 tablespoons of unsweetened cocoa plus 1 tablespoon of shortening or butter (ingredients I always have).

Here's a list of substitutions I have hanging on the inside of my baking cupboard door for easy reference:

1 teaspoon Apple or Pumpkin Pie Spice=1/2 teaspoon cinnamon, 1/4 teaspoon nutmeg, 1/8 teaspoon allspice
1 teaspoon Baking Powder=1/4 teaspoon baking soda plus 1/2 teaspoon cream of tartar
1/4 cup Dry Bread Crumbs=1/4 cup cracker crumbs, 1 slice bread cubed, or 2/3 cup rolled oats
1 cup Buttermilk=1 tablespoon vinegar or lemon juice plus milk to make 1 cup or 1 cup plain yogurt
1 square (1 oz.) Unsweetened Chocolate=3 tablespoons unsweetened cocoa plus 1 tablespoon shorteneing, margarine, or butter
2 oz. Semi-sweet Chocolate=1/3 cup semi-sweet chocolate chips
1 medium ear of Corn=1/2 cup kernels, frozen or canned
1/2 cup Corn Syrup=1/2 cup sugar plus 2 tablespoon liquid
1 tablespoon Cornstarch=2 tablespoon flour or 1 1/3 tablespoon quick-cooking tapioca (used as a thickener)
1 cup Heavy Cream (for baking, not whipping)=3/4 cup whole milk plus 1/4 cup butter
1 cup Light Cream=7/8 cup milk plus 3 tablespoons butter
1 cup Half-and-half=1 1/2 tablespoons butter plus 3/4 cup plus 2 tablespoon milk
1 Egg=2 egg yolks (in baking, add 1 tablespoon water)
1 Egg (for baking and meatloaf or meatball recipes)=1 tablespoon Soy powder plus 1 tablespoon water*
1 cup Cake Flour=7/8 cup flour plus 2 tablespoons cornstarch
1 cup Self-Rising Flour=1 cup all-purpose flour plus 1 1/2 teaspoons baking powder and 1/2 teaspoon salt
1 Garlic Clove=1/8 teaspoon instant minced garlic or garlic powder or 1/2 teaspoon garlic salt
2 tablespoons Green or Red Pepper=1 tablespoon sweet pepper flakes
1 tablespoon Fresh Herbs=1 teaspoon dried herbs
1 teaspoon Lemon or Orange Peel=1/2 teaspoon dried peel
1 cup Whole Milk=1/2 cup evaporated milk plus 1/2 cup water
1 cup Whole Milk=1 cup skim or reconstituted nonfat dry milk plus 2 teaspoons butter
1 small Onion (1/4 cup)=1 tablespoon instant minced onion or onion flakes, 1/4 cup frozen chopped onion or 1 teaspoon onion powder
1 package Active Dry Yeast=2 1/4 teaspoons dry yeast

Substituting Honey for Sugar in a recipe:
Use 1 cup honey for 1 cup sugar and reduce the liquid in the recipe by 1/4 cup

Tomato Substitutions:
1 (8 oz) can tomato sauce=3 large fresh tomatoes cooked
1 cup tomato puree=1 cup cooked tomatoes, pureed in blender or food processor
1 (1-pound) can whole tomatoes=6 large tomatoes cooked in 1/2 cup water or tomato juice
1 (1-pound) can stewed tomatoes=6 large tomatoes cooked in 1/2 cup water with onions, green peppers, salt, pepper, and sugar
6 oz. tomato paste=6 large tomatoes cooked plus omit 1 cup water from recipe
Tomato Juice=Use equal parts cooked pureed tomatoes and water
1 (10 3/4-oz) can tomato soup=3 large tomatoes cooked in 1/2 cup water or tomato juice

I also have a substitute for cream soups that I wrote about a couple of weeks ago.

*I learned about this trick from Amy Dacyczyn of The Tightwad Gazette. I'm not a big fan of soy products but since we don't eat many convenience foods that are usually loaded with soy (which means soy overload in our systems), I don't mind using this. I got it at my local health food store and it came in a 22-oz bag and cost $3.99. Even though it has a pretty long shelf life, I keep mine in the freezer so I don't have to worry about using it up before it expires.

This is a pretty long list, I know, and I have not used all of these substitutions, but it's nice to know that I have options for a recipe if I need it.

In another post, I will share what I usually have stocked in my pantry.

I'm linking up with Frugal Friday at Life as Mom.

Monday, August 16, 2010

Chickpea Salad


This is one of our favorite salads to have when tomatoes and cucumbers are at their peak. Plus it comes together in minutes! I got the recipe from a Better Homes and Gardens magazine several years ago.

Chickpea Salad

3 cups coarsely chopped tomatoes (about 4 medium)
1 15-oz can chickpeas (also known as garbanzo beans), or 2 cups cooked, rinsed and drained
1/2 of a large cucumber, peeled, quartered, and sliced (about 1 cup)
1 cup chopped green pepper
1 cup snipped fresh cilantro
1/4 cup finely chopped onion
1/ cup olive oil
3 tablespoons red wine vinegar
1 teaspoon salt
1 clove garlic, minced
1/8 teaspoon sugar

In a bowl, combine the tomatoes, chickpeas, cucumber, green pepper, cilantro, and onion. Set aside. In a small bowl or jar with a lid, combine the oil, vinegar, salt, garlic, and sugar and mix (or shake) well. Pour over the vegetables and lightly toss to coat. Cover and chill for a couple of hours and serve. Makes 8-10 servings.

I'm linking up with Tempt My Tummy Tuesday at Blessed with Grace and Tasty Tuesday at Balancing Bedlam and Beauty.

Wednesday, August 11, 2010

Soups On!

This is the first in my series of blog posts about how I've learned to shave a few dollars here and there from our grocery budget. I know many are having a hard time financially, including our own family. We recently lost a portion of our income and even though I have considered myself pretty savvy when it comes to being budget-minded in the kitchen, I've been challenged even further and would like to share what I've learned and am learning.

One of the best ways to feed a family on practically no money at all is by making soup with some homemade bread or even just crackers. In the last couple of years, I've started saving little bits of leftovers and putting them into the freezer, you know, the stuff that usually got thrown away because there was so little of it that it wasn't worth keeping. I also go through the refrigerator about once a week to see what needs to eaten up quickly, and if I doubt that it will get eaten, I throw that into the freezer, too.

The pot of soup that is pictured above was made with almost all leftovers that I had stashed in the freezer. I saved some canned tomatoes in their juice, potato water (from boiled potatoes), chicken broth, mixed vegetables, pieces of chicken, and leftover rice. I added some fresh onion, celery, and cabbage that I had in the refrigerator. I really don't know how much it actually cost to make this soup but I'm pretty sure it was under $2 for the whole pot. We had some fresh homemade bread with this soup and it was really good. Of course, every time you make this kind of soup, it's going to be different, but you are using up just about everything that might have been thrown away. It feels good to not waste what God has given to us.
Another thing I do is I always make my own broths-chicken, beef, vegetable, or fish broth. It is so easy, especially if I make it in the crockpot, one of my favorite kitchen appliances. I throw everything in there and leave it all day. Not only is making my own broth cheaper than store-bought, it tastes so much better.
One more trick when it comes to making broths of any kind that I've recently implemented is whenever I cut up an onion, a clove of garlic, a carrot, celery, peel a potato, or any other vegetable, I save the peel, skins, ends, etc. and throw them in a large freezer bag that I keep in the freezer. Then, instead of adding fresh onions, carrots, celery, garlic, etc. to make my broth, I just throw the stuff that I used to throw away into my pot.
I believe anything that we can do to save some money in these leaner times, no matter how small it may seem, is a step in the right direction, even if it means eating Leftover Soup once in awhile :)
I'm linking up with Make It From Scratch

Sunday, August 8, 2010

Peanut Butter Oatmeal Chocolate Chip Cookies


With a short reprieve from the 90-degree heat this past weekend (we were a cool 82 degrees on Sunday!), I decided to heat up my oven and make some cookies. We will be going back to extremely humid and high temperatures at least for the next few days, so I will not be turning the oven back on for awhile.

There's just nothing like a homemade cookie, and if you like peanut butter and chocolate, well, this one's for you.


Peanut Butter Oatmeal Chocolate Chip Cookies

1/2 cup soft butter
1 cup peanut butter
1 cup light or dark brown sugar, packed
1 egg
1 teaspoon vanilla
1 cup flour
1 cup oats, quick or old-fashioned
1/4 teaspoon salt
1 teaspoon baking soda
1 cup semisweet chocolate chips

Preheat oven to 375 degrees. Lightly grease a baking sheet. In a large bowl beat together the butter, peanut butter, brown sugar, egg, and vanilla. Sift together the flour, oats, salt, and soda in a separate smaller bowl and add to the butter mixture. Add the chocolate chips. Drop by rounded teaspoons onto baking sheet. Bake at 375 for 7 minutes or until browned on the edges and bottom of cookies. Cool on a rack.

For crispy cookies-After dropping dough onto baking sheet, flatten with a fork and bake for 10 minutes.
I linking up with Tasty Tuesday at Balancing Bedlam and Beauty and Tempt My Tummy Tuesday at Blessed With Grace.

Thursday, August 5, 2010

Hamburger Casserole-Updated

I've blogged about this recipe a couple of other times on my other blog and there's probably a reason or two for that. It's really easy to put together and it's one of those dishes I grew up on, which takes me back to my childhood in my mom's kitchen. I've made this recipe for my daughters more times than I can count but I rarely make it anymore because I hardly ever use the canned cream of mushroom soups. But, now that I know how to make my own cream of "whatever" soups, I can make dishes like this more often. In fact, after making my homemade cream of mushroom soup the other night, I went ahead and made this casserole, too. I've only known this recipe as Hamburger Casserole and I have no idea where my mom got it but here it is, updated from when I was a kid.

Hamburger Casserole

*1 lb. ground beef
1-1 lb. bag of noodles or other pasta shapes
1 can cream of mushroom soup or make your own
2 (8 oz.) cans tomato sauce
Salt and pepper to taste
1 cup shredded cheddar cheese

Cook ground beef until browned. Drain or rinse as desired. While that's cooking, start boiling water for the pasta. Add the mushroom soup and tomato sauce to the ground beef. Drain the pasta when cooked al dente and add to the ground beef mixture. Add salt and pepper to taste. Add the cheese and combine until the cheese is melted. Serve. OR, you can combine everything except the cheese, spoon into a casserole dish, sprinkle the cheese on top and put in a 375 degree oven until the casserole starts bubbling, about 30 minutes.

*You can use less ground beef here to save on the grocery budget :)

I'm linking up with Foodie Fridays.


Cooking on a Shoestring Budget


I would like to start doing a series on how I have learned to save money in the kitchen. Over the years I've tried to come up with different tricks to getting the most out of our grocery budget, yet still get the most nutritious bang for our buck, so to speak. Lately, I have been challenged even further in this area and I know other people are feeling the squeeze in their budgets, too.


Graphic courtesy of All Posters.