Tuesday, February 23, 2010

Cilantro Recipes


Sandra recently asked if I would post some recipes using cilantro, and I'm glad to do it since it is one of my favorite fresh herbs to use. I can always find it at my Mexican or regular grocery store for as little as 3 bunches for one dollar. I use it in salsas all the time and I even found a recipe to use it in as a rub for chicken.

This salsa recipe is my new favorite because I almost always have the ingredients on-hand to make it. It's adapted from a recipe I found on Fishmama's cooking blog and have made it several times as a sauce for our Mexican cooking.

Salsa
28 ounce can diced tomatoes
1/2 bunch fresh cilantro, rinsed well
1/2 sweet onion, chopped
1/2 chopped canned chipoltle pepper in sauce or 1/4 teaspoon crushed red pepper or 1/2 chopped fresh jalapeno
1 Tablespoon lemon or lime juice
salt and pepper
In large bowl, combine all ingredients. Serve with tortilla chips or other Mexican dishes.

This is another one of my family's favorites that I got from the Moosewood Cookbook by Mollie Katzen. It is a vegetarian cookbook but she does such wonderful things with food that I really love trying some of her recipes. Lots of flavor! I originally posted this recipe and the next one on my other blog but since this is my new cooking blog, I thought I would copy onto this post so it would be available to me and to whoever else was interested.

A couple of notes on this recipe: If you don't think you would like lots of salsa on your chili, you can halve the ingredients. I've used it to top brats, burritos, or to mix with scrambled eggs. Okay, on to the recipe.

Black Bean Chili

4 cups dried black beans
5 to 6 cloves garlic, crushed
2 teaspoons ground cumin
2 1/4 teaspoons salt
Black pepper, to taste
2 teaspoons dried basil
1/2 teaspoon dried oregano
Crushed red pepper or cayenne, to taste
1 tablespoon lime juice
2 medium-sized green bell peppers, chopped
1/2 cup tomato puree (You can also use crushed tomatoes or tomato sauce)
2 (4-oz.) cans diced green chilies

Red Onion Salsa
Grated cheese and sour cream

Soak the beans in plenty of water for several hours or over night. Drain off the soaking water, and cook in fresh boiling water, partly covered, until tender. Check the water level during cooking; add more as necessary. Transfer the cooked beans to a large kettle or saucepan. Include about 2 to 3 cups of their cooking water. (You can certainly do this ahead of time and freeze the beans or put them in the refrigerator for a few days until you are ready to use them.)
In a big pot or Dutch oven, saute garlic, seasonings, lime juice, and bell peppers in olive oil over medium-low heat until peppers are tender.
Add the the cooked beans, along with tomato puree and canned green chilies. Simmer, covered, over very low heat, stirring every now and then for about 45 minutes. (Make salsa at this time.)
Serve topped with Red Onion Salsa, grated cheese, and sour cream.

Red Onion Salsa
2 cups chopped red onion
1/2 cup packed minced fresh cilantro
2 cups minced fresh ripe tomatoes
1/2 teaspoon salt
1 cup packed minced fresh parsley
Black pepper, to taste
Combine all ingredients and mix well. For a finer consistency, give the mixture a brief whirl or two in a food processor or blender.
6 to 8 servings

I wish I had a picture of this next dish for you. Better yet, I wish you could taste it and see how very delicious it is. I've made this once using skinless, boneless chicken thighs because that's what I had. It was also in the middle of January, so I used my cast iron grill pan to cook them on inside. The important thing is the rub you put on the chicken. So good!

Chile-Cilantro Grilled Chicken

1/4 cup finely chopped cilantro
3 tablespoons minced garlic
1 tablespoon minced jalapeno chile
1 tablespoon grated lime peel
1 tablespoon olive oil
1 tablespoon chili powder
1 tablespoon ground cumin
3/4 teaspoon salt
4 bone-in skin-on chicken breast halves or whatever parts you like

Heat grill. Combine all ingredients except chicken in small bowl. Generously rub over chicken and under skin. Grill, covered, over medium heat or coals 14 to 18 minutes or until no longer pink in center, turning once.4 servings

For those of you interested, this dish contains per serving: 235 calories, 11.5 g total fat (2.5 g saturated fat), 28 g protein, 4.5 g carbohydrate, 75 mg cholesterol, 525 mg sodium, 1 g fiber
This is a recipe I got from the Cooking Pleasures magazine.

There are a couple of things to remember about cilantro: It is best to use cilantro at the end of the cooking time because it will lose some of it's flavor as it heats. As with all fresh herbs, they will only last about a week in the refrigerator. When I bring cilantro home, I will trim the stems a little and place the bunch in a glass of water and set it in the refrigerator. You can also store it wrapped in a damp paper towel placed inside a large baggie.
I hope this gets you started on using cilantro in your kitchen. In fact, I have some in my fridge that I need to use up before it goes bad.

Sunday, February 21, 2010

Eat Your Veggies!

Do you have a hard time eating all your veggies every day? I sure do. Opening a can of peas or heating up a bag of frozen corn can get a little bland and monotonous to me, so I've found some ways to make vegetables taste really good and the two recipes for vegetables I'm sharing with are ones that I made in the same meal. They are that easy. The first one takes less than 5 minutes to prepare. The second one takes only a few minutes to chop up some veggies and is more a method than a recipe, and can be used with just about any fresh vegetable.

My husband loves spinach and when we ate at an Italian restaurant a few years ago, he had sauteed spinach. The waiter was kind enough to share with us how this dish is prepared and it's so easy that I make it very often for my husband.

Sauteed Spinach


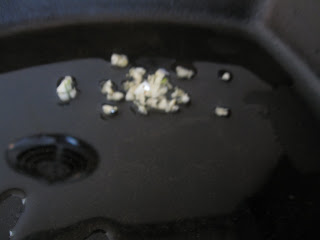
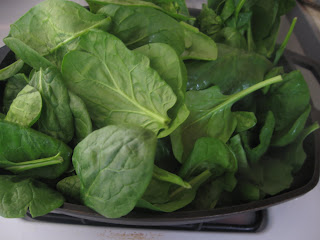
Coat your pan with a couple tablespoons olive oil. Add 1 to 2 cloves of garlic. Turn on the heat to medium high, letting the garlic infuse the oil with it's wonderful flavor. When the garlic starts to sizzle, add your spinach. I use a 10-ounce bag of baby spinach usually.


It seems like there isn't enough room in the skillet for the spinach but it cooks down very quickly. Add salt and pepper to taste and stir it around (I use tongs) until it looks like this:


Only not so blurry LOL

Delicious!

My other favorite way of cooking veggies is roasting and carrots are amazing this way. Again, very few ingredients and yet the flavors develop so well that I could have eaten just the carrots for our meal. So good!

Roasted Carrots

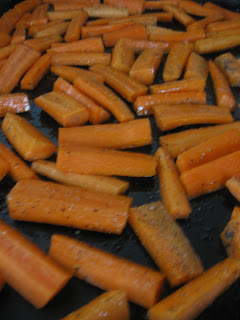
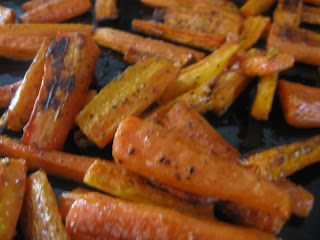
I took 5-6 carrots and cut them up into similar-sized pieces and put them on a baking sheet. I drizzled them with olive oil, salt and pepper, and tossed them with my hands to coat the carrots with the oil. I put them in a 375-degree oven for about 30 minutes, stirring about every 10 minutes, until they look like this:


The vegetables develop their natural sweetness and carmelize into such yumminess. You can do this with just about any vegetable. What I often do when I have several kinds of vegetables that need to be cooked up in the vegetable bin of my refrigerator, I will make mixed roasted vegetables. I use this method with onions, garlic, zucchini, eggplant, mushrooms, potatoes, broccoli, cauliflower, carrots, brussel spouts, tomatoes, sweet potatoes, parsnips, turnips, etc.


Easy Tomato Sauce

This is a sauce that I make at least once a month. I use it for putting over spaghetti, in lasagna, on my homemade pizza, and where ever else I want a flavorful tomato sauce. I got it from a OAMC cookbook at the library and copied it but I have since forgotten the name of the book. The original directions say to make it in the slow cooker but as you will see it can also be made on top of the stove, which I like better because I like sauteeing the onions before adding the other ingredients to give them a chance to get soft. If you don't want to do any chopping, you could also substitute dried onions or onion powder for the onion and garlic powder for the minced garlic.


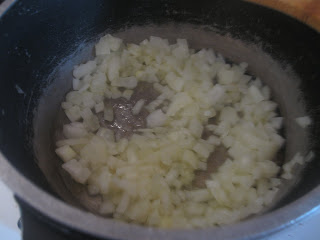
Chop one large onion and saute in oil in a large pot for a few minutes until soft. Add 3 cloves of minced garlic the last couple of minutes but be careful not to let it burn.

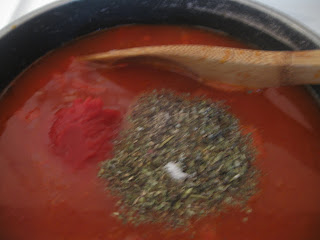
Add 24 ounces of tomato sauce (3-8 ounce cans), 18 ounces of tomato paste (3-6 ounce cans), 3 cups water, 3 teaspoons oregano, 3/4 teaspoons basil, 3 teaspoons sugar, and 3/4 teaspoons pepper.


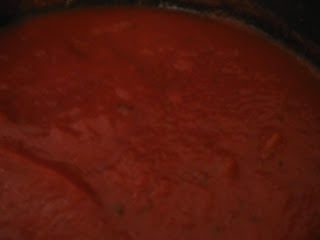
Let it simmer slowly for about half an hour. It will thicken. Taste and adjust seasonings as needed. This makes 2 quarts of sauce that you can freeze it in batches if you want.

Tuesday, February 16, 2010

Caring for Your Cast Iron

There's nothing like cooking with well-seasoned cast iron cookware. It's one of the few products still in high demand and with proper care can last for a hundred years or more. It's definitely an investment that can be passed on from one generation to another. Cast iron retains heat very well and cooks evenly, too. I've even heard that the iron from the pans leach into the food eaten, thereby giving needed iron into the diet.

I use mine for just about everything from stews to cornbread to scrambled eggs. The one above is my very first. Isn't it a beauty? I found it at a thrift store for $5 and I snatched it right up because cast iron isn't always easy to find. I was a little intimidated by cast iron because I wasn't very familiar with it until I found out how easy it is to take care of.


I was able to visit the Lodge Cast Iron Store in South Pittsburgh, Tennessee, last fall when we were visiting my mom. She bought a cast iron skillet or pot for each of my daughters and she bought herself and me each a Dutch oven.


So, how do I take care of this kind of pan? It isn't the same as nonstick or aluminum or glass cookware, but the rules are very easy to follow. You may think at first that it's too much bother but they are such a dream to work with and they last for-ev-er-you will love them as much as I do.

Lodge cast iron is seasoned when you buy it, so taking care of it properly means remember a few simple rules:
  1. After cooking, clean the pan with hot water and a stiff brush. Never use harsh detergents and don't put it into very cold water.
  2. Towel dry the pan and wipe a light coat of cooking spray or oil all over it.
  3. Store in a cool dry place.

If you find an old cast iron pan, you may have to "season" it because it wasn't properly taken care of and it may have some rust on it. That's okay, you will just have to take care of that before you use it.

According to the Lodge Company to season cast iron:
  1. Wash the pan with hot, soapy water and a stiff brush.
  2. Rinse and dry completely.
  3. Spread a thin coat of oil, any kind all over the entire surface of the pan.
  4. Line the lower oven rack with aluminum foil (to catch drippings).
  5. Heat the pan for 30 to 60 minutes upside down in a 350-degree oven. Once done, let the pan cool to room temperature.

Keep your eyes peeled at second-hand stores for cast iron. They are worth waiting for.

Monday, February 15, 2010

Baked Fudge


Last night I was really wanting something chocolatey and sweet to eat after dinner and I had seen a baked fudge recipe on Snow White's blog and thought how easy and delicious it looked. She adapted her recipe from Pioneer Woman's blog, and, well, that's how we get recipes, isn't it, from other great cooks? So, I made some Baked Fudge, topped it with some vanilla ice cream, and it didn't disappoint at all. I will be making it again.
Baked Fudge
2 eggs
3/4-1 cup sugar ( I used somewhere in between but I will go with 3/4 cup next time since I think it will be sweet enough)
2 heaping tablespoons cocoa
2 tablespoons flour
6 tablespoons butter, melted
1 teaspoon vanilla
Preheat oven to 325 degrees. Beat eggs until scrambled and then beat in the sugar until combined. Add the cocoa, flour, butter, and vanilla and mix well. Pour the batter into 4 ramekins or 1 8-inch pan. Set dishes or pan into a larger pan, filling it halfway with water. Bake for 40-50 minutes or until the upper crust is crispy and the rest of the batter is set. A toothpick will not come out clean but you don't want a runny batter. You also don't want a brownie. I underbaked mine a little but they were still beyond delicious. You could also serve these with whipped cream. So good.
For more great recipes from other great cooks:

Sunday, February 14, 2010

Menu Plan Monday

I'm taking lots of help from my freezer again this week. In fact, I won't be doing much grocery shopping for the rest of the month, except for things like milk, eggs, and fresh produce. My two still-home daughters haven't been home much lately, so I've just been feeding my husband and myself for the most part, which means that we have lots of leftovers and sometimes I don't make everything that was on the previous week's menu plan.


Here's what's planned for our menu this week:


Monday: Spanish rice and beans, homemade tortilla chips, salsa, and all the trimmings (cheese, sour cream, lettuce)


Tuesday: Johnny Marzetti Spaghetti Pie, green beans, french bread


Wednesday: Black Bean patties, cole slaw, soaked whole wheat bread from the bread machine


Thursday: Greek Chicken (I made a double recipe and froze half) and roasted potatoes

Friday: Pork and Sauerkraut

For meal planning inspiration, visit I'm an Organizing Junkie to see other meal plans.


Monday, February 8, 2010

White Chili


This is comfort food at it's finest! I just love soups and stews and White Chili is one that I discovered only a couple of years ago and I just fell in love with it. I've seen lots of recipes for White Chili but I like this one because I usually have everything in my pantry for it. I had my beans, cooked and shredded chicken, and homemade chicken broth waiting for me in the freezer, so this was a breeze to throw together.

White Chili

4 cups navy or Great Northern beans (soaked and cooked), or 2 cans
4 cups chicken broth
1 1/4 cups chopped onion
1 clove garlic, minced
1 or 2 tablespoons oil, butter, or other fat
1/4 teaspoon salt or to taste
2 cups chopped cooked chicken
1 (4-ounce) can chopped green chiles
1 teaspoon ground cumin
3/4 teaspoon dried oregano
1/4 teaspoon ground red cayenne pepper
Shredded Monterey Jack cheese for sprinkling on top of chili

In a Dutch oven or large pot, heat oil over medium heat. Add onions and saute until almost translucent. Add garlic and saute for a couple of minutes. Add the rest of the ingredients except cheese and bring to a boil. Simmer for 30 minutes or until flavors have melded together. Spoon into serving bowls; top with cheese. Makes 6 servings
We like to serve this with our healthier version of tortilla chips.
I'm participating this week in Tempt My Tummy Tuesday and $5 Dinners


Sunday, February 7, 2010

Menu Plans for This Week


I'll be babysitting for my grand daughter today over at my daughter and son-in-law's house, so dinner will be something I can pull from the freezer. Gotta love stocking up the freezer for those days when I won't be around to cook or I just don't have the time or energy.

So this is the plan for our meals this week:

Monday-Ham and Beans and Cornbread (from the freezer)

Tuesday-Johnny Marzetti Spaghetti Pie (I'll finally be making a double recipe for this and put one in the freezer)


Thursday-Black Bean Cakes on homemade buns

Friday-White Chili and tortilla chips (I'll be posting the recipe later this week)


I'm participating in Menu Plan Monday at I'm An Organizing Junkie

Thursday, February 4, 2010

Pancakes and Waffles

I love pancakes and waffles. My husband, not so much. He'd rather have a couple of eggs, over easy, thank you very much. But the rest of the family just loves pancakes and waffles. When my girls were younger I would buy the packaged, just-add-water kind of mix, but I remember one morning one of my daughters asked if I could make pancakes and I was out of mix. So, I got out my Pillsbury cookbook and found a from-scratch recipe for pancakes. The girls loved them. Fast forward a couple of years later, when I was learning about the benefits of whole grains and found a recipe for Whole Wheat Pancakes. We were hooked. They tasted so much better than the white flour variety and they kept the girls fuller for a much longer time, yet they didn't eat as much. Interesting, hmm?

Today my husband was in the mood for breakfast for dinner, so I made grapefruit halves, bacon, eggs (of course!), and waffles using my whole wheat pancake recipe. Yes, I know there are separate recipes in many cookbooks for pancakes and waffles but I've found that they are pretty interchangeable and I have used this recipe for either.

Whole Wheat Pancakes (and Waffles!)

2 cups whole wheat flour
2 tablespoons sugar
3 teaspoons baking powder
1 teaspoon salt
1/2 teaspoon soda
2 cups milk
1/4 cup oil or melted butter
2 eggs

For pancakes: Heat griddle to 400 degrees or skillet on medium-high heat. In large bowl, combine first 5 ingredients. Add remaining ingredients; beat (or stir) just until large lumps disappear. Lightly grease heated griddle or skillet. A few drops of water sprinkled on pan will sizzle and bounce when heat is just right. Pour batter, about 1/4 cup at a time, onto the hot pan. Bake until bubbles form and edges start to dry; turn and bake the other side. Makes sixteen 4-inch pancakes.

For waffles: Heat waffle iron. Follow instructions above for mixing ingredients together. Bake in hot waffle iron until steaming stops (my waffle iron has a light that tells me when it is done) and waffle is done to a golden brown.

We love to add all kinds of things to our waffles and pancakes: nuts, bananas, blueberries, chocolate chips, or apples and cinnamon.

This is another recipe I tried last week for pancakes or waffles. This batter can be kept in the refrigerator for up to 4 days. After a couple of days they will develop a slight sour dough flavor. This is what the batter looked like after one day in the refrigerator. There were a few bubbles forming from the yeast.


Make Ahead Pancake and Waffle Batter

2 1/4 cups unbleached flour (I used half whole wheat flour)
2 tablespoons sugar
1 teaspoon salt
1 package active dry yeast (or 2 1/4 teaspoons)
2 cups milk
1/4 cup butter or oil
3 eggs

In large bowl, combine first 4 ingredients. In small saucepan, heat milk and butter until very warm (120 to 130 degrees). Add to flour mixture along with the eggs. Beat at medium speed until smooth. Cover and refrigerate up to 4 days, adding 2 additional tablespoons of sugar after the second day. Prepare as you would regular pancakes or waffles.

Nowadays we don't usually eat a whole batch of pancakes or waffles in one sitting, so I have been freezing them for when we want them again.

Wednesday, February 3, 2010

Cheesy Broccoli and Rice with Chicken

As I continue in my quest to fill up my freezer with made-from-scratch ready-made meals, I think I'm finding my rhythm and what works for me. I don't think I will ever do a OAMC (Once a Month Cooking) session but I will be doubling and tripling my recipes as I go along making meals and snacks for my family. In the picture above I have a Cheesy Broccoli and Rice with Chicken Casserole ready for the freezer. It really helps me to label exactly what is inside the dish, the date of when I put it in the freezer, and directions on heating it up. It's a make-over recipe from a more common recipe made with canned soup, white rice, and processed cheese. I instead used my homemade cream of chicken soup, brown rice, cheddar cheese, and homemade chicken broth. Just about all of the ingredients used in this recipe can be made ahead of time and frozen as well, and when you are ready to make this casserole, just mix everything together.
This picture is the one that was to go right into the oven. And here's the recipe that I used, which is adapted from Amy:
Cheesy Broccoli and Rice with Chicken
2 cups cooked brown rice (I make lots of this at once and freeze in small baggies)
2 cups cooked, diced chicken (I usually have cooked chicken waiting for me in my freezer)
2 cups chopped fresh or frozen broccoli
1 cup cream of mushroom or cream of chicken soup (I make at least a double recipe and again, freeze it)
1 cup shredded sharp cheddar cheese, plus more for sprinkling over the top
1 1/4 cups milk or chicken broth
1 teaspoon salt
1/2 teaspoon pepper
1 cup bread crumbs
Mix together in a large bowl. Pour in a 9 x 13-inch pan. Bake at 350 degrees for 20-30 minutes or until bubbly.

Here is my recipe for Homemade Cream of Chicken Soup adapted from Tammy's recipe.

Yield:
3 cups (about 2 cans)
Ingredients:
1 1/2 cups chicken broth*
1/2 teaspoon poultry seasoning
1/4 teaspoon onion powder**
1/4 teaspoon garlic powder***
1/8 teaspoon black pepper
1/4 teaspoon salt (or less; taste to test)
1/4 teaspoon parsley
dash of paprika
1 1/2 cups milk
3/4 cup flour
1. In medium-sized saucepan, boil chicken broth, 1/2 cup of the milk, and the seasonings for a minute or two (longer if using fresh onions or garlic).
2. In a bowl, whisk together the remaining 1 cup of milk and flour. Add to boiling mixture and continue whisking briskly until mixture boils and thickens.
Additional Notes:
*I use the broth from my oven-roasted chicken. Refrigerate broth and then take fat off the top and save it for sauteing vegetables in! You can also use chicken bouillon + water for your broth.
**Or, diced onions (boil with broth for a few minutes)
***Or, fresh minced garlic (boil with broth for a few minutes)
Preparation Time:
5 minutes
Cooking Time:
10-15 minutes